Welcome back folks! It's that time again!
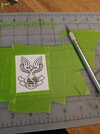
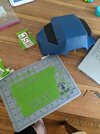
First SMG - after a few failed prints and some fiddling with files, the barrel is ready to be printed. I'm still not sure I have enough filament to print the upper receiver and/or the pistol grip so that's still on hold. BUT I did update the sight in the file to be more accurate to the rookie cosplay guide. As you can see, I took out the weird iron sights that were in the file originally and edited in the arch.
There is also a cutout from the arch that will be included in the file which you can use as a template to cut a piece of plastic to complete the sight.
View attachment 307090View attachment 307091
However, the sight is bowed. Idk if you see it in this pic but it doesn't sit flat and idk why... It's the first piece to have this problem.
View attachment 307092
I am gonna thoroughly clean my nozzle and bed and relevel everything. I also am going to make some minor changes to my printer settings and fan settings and whatnot to see if I can fix this..
On to the armor-
The left thigh is ready for fiberglass. I was going to fiberglass it yesterday but then I thought maybe it needed another layer of just resin. I didn't really but it's not like it's going to hurt the piece.
View attachment 307101View attachment 307098
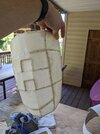
The right thigh is coming along in pep. I'm going to install magnets into this one to (theoretically) mount my SOCOM to my thigh when not in use so to speak. That will be a bit of an adventure so I will try to take progress pics of that process. I have seen people use magnets to attach stuff with foam but idk how it's going to go with pep and 3d printed props...
View attachment 307093View attachment 307094
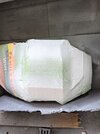
The chest base layer has one dose of sanding done and a second layer of bondo has been applied. Needs lots more but progress is progress.
View attachment 307096
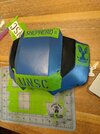
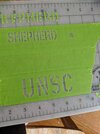
Also, I made a med ref sticker for my left shoulder plate and attached it. It's just a paper sticker so I put a bunch of layers of clear coat over it and I'm gonna do a little black wash and then it will hopefully look pretty awesome. I like how it looks so far so I'm hopeful.
View attachment 307097
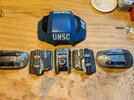
The butt plate has been primered and silvered. Just gotta do some of my primary grey color and some black detailing then it's pretty much done. My plan is to get a memory foam type cushion and cut it so that it fits inside the pep piece for leaning and sitting and whatnot but that's a ways down the line as of now.
View attachment 307100
Lastly, I attached the center power pack thing to my chest plate with a cloth hinge so it has some wiggle but doesn't have to be attached separately to the undersuit.
View attachment 307095
I think that's all. I may be getting some more abs in soon idk. I haven't actually finished off the roll I have yet so I should be able to make some more progress before buying more. Everytime i think it's about to be empty another layer is revealed.


 .
.