- Member DIN
- S530
That I did NOT see. But unfortunately I have no budget to purchase said visor.
I wish, though. That would totally rock.
I wish, though. That would totally rock.
Last edited:
Let me know, I'll send you the link. They're $75.That I did NOT see. But unfortunately I have no budget to purchase said visor.
I wish, though. That would totally rock.
That I did NOT see. But unfortunately I have no budget to purchase said visor.
I wish, though. That would totally rock.
AWESOMESWEETCOOLAMAZING
Is that one word? I think mblackwell1002 need to update his dictionary once again...
Today I have:
Sealed the forearms, biceps, shoulders, chest, backpack, and shins. Shoe goo'd the thighs, part of the helmet, and sewn most of the undersuit. The undersuit would be done, but I'm missing the zipper and the collar pattern, so I can't go any further today.
Some of the chest damage was filled in, so I'll have to go back and touch that up before painting, but otherwise I am so super excited to be at this stage! XD (don't worry about those glaring gaps. I have a plan that I think will look BOMB)
View attachment 270086
View attachment 270087
Paint colors.
Using a home depot app and several screenshots of gameplay and my reference photos, the three most popular colors are deepest earth green, deepest woodland green, and black onyx.
Now I'm beginning to wish I has paid more attention in art class so I know how best to mix these things. And also gotten better grades and better job so I could afford these things!
Don't know that I'll make my Saturday deadline but I'll be pretty close!
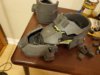
If I may summon from the deep the mighty ExCeLLuR8 once more, may I have a good up close look at your shoes, please? How they were constructed and etc...


Yup I totally agree. That's another reason I didn't want to get crazy with paint mixing. No matter what you do, second batch will never be the same. Luckily my wife was able to figure out the exact pantone codes for all his colors and match them to Sherwin Williams color codes. Oakmoss for halo 3 is spot on. Also something else to note. Don't use the cheap samples for your actual paint job, they're cheap for a reason and rub off with your thumb friction. Only good for testing. The exterior enamel is crazy strong, really flexible does not wrinkle, Crack or peel, and also sheds water really well.Looks dam close. The problem w/ mixing your own color.......sometimes the 2nd batch doesn't always come out matching the same. Make sure to mix enough for the whole suit. Then there is the issue of touch-ups and repair work later on.....and trust me, there will be.
I love how clean your foam work is. This is what I want to strive for! It will take me multiple armor attempts to reach your level of skill but you have mastered foam work. Your work revived my hopes of foam being used for detailed builds. Keep up the amazing work!
Dude get pics posted ASAP I cant wait to see them! Make it happen! Haha I knew you've been working hard the last couple of days case you've been a little quiet on your thread. Maybe try the pics in an hour or so. I like the camel back idea, I've been thinking about doing this myself actually cause I know I'll be thirsty in this thing! I can't wait to see how your boots turned out. The thick soles are a little noisy when walking but honestly I think it adds to the heavy armor walking tank effect. Haha I plan to wear my suit outside in the fall at a couple of local evens so there is always the potential for mud and gravel, I wanted a really tough boot personally.For some reason I am unable to post pictures. That stinks. So I guess for the time being we're stuck with just a text update.
I dedicated my afternoon and evening yesterday to the suit. I finished the undersuit construction, bought some horse-stall mats for the soles of the boots and installed them, prepped the boots for some finishing details before sealing and painting, painted the forearms, butt plate, and shins white to match the white chest piece and ab plate that were sealed with white leak- seal, and filled in the glaring canyon in my helmet cheek. I have the helmet about half-way shoe goo'd as well.
I have redone the damage in the chest, added some final details to the back and jetpacks, and am about to get some rubber tubing installed on the under suit, as well as velcro patches and snaps to help keep the armor in place.
I'm tempted to take a Camelback pouch and fit it inside the back, then make one of the chest tubes a drinking straw, since it feeds right under the helmet... that may lead to problems, though.
I'm really bummed about not being able to post pictures. I had a whole suit up, minus the undersuit details and paint. :'(
 )
)The undersuit in halo 4-5 isn't completely black just you know
They have some grey digital camo spots all over the suit.
But I'm just nitpicky.