1st Build WandererTJ's Mjolnir Mk. V (Custom) - S-128 - [Hybrid Build] [Pic Heavy]

Status
Not open for further replies.
xXDashIVXx I model my own props. Turbo only helped me print things.
With the exception of a surprise he sent me, but I haven't covered it yet.

I didn't play a lot of 5, joined the party way late. My old crew are all on PS4 now. I mainly just played enough to get the 1000 GS.
I am sorry for my confusion. They came out great! The use of the cans was also very smart.
req-08-542-10b4e49cde3042b3b615b891f1e3006b.jpg

Now we are full of suspense to see this "suprise" xD
 
xXDashIVXx :lol:.
We'll see if that's what the surprise is ;).

With the use of waterslide decals, it honestly wouldn't be impossible. I've actually been thinking of modeling BoomCo filler pieces to close in the frontal dart holders and the screw holes.
 
Today, I've mostly gone back and edited this post:

Really just trying to get everything in order without straight up rearranging the posts so the comments from you guys don't make any sense.

Honestly, I've still got picture space, so I'll be adding and updating more to this post as well.


xXDashIVXx do we have game files for the Halo 5 magnum's model and textures?
 
Last edited:
Today, I've mostly gone back and edited this post:

Really just trying to get everything in order without straight up rearranging the posts so the comments from you guys don't make any sense.

Honestly, I've still got picture space, so I'll be adding and updating more to this post as well.


xXDashIVXx do we have game files for the Halo 5 magnum's model and textures?
If by texture, you mean for the skin, then no I do not believe anyone has it. I'm not too sure there is a straight model rip either, but there are a few high quality models floating around in the armory and on thingiverse...
 
Electronics - Part 1
So first off, I busted my a$$ trying to find LEDs in a frosted blue/sky blue/light blue/cyan color.
I ordered some blue ones off of Adafruit's website that in the pictures looked like I wanted.

What came in, was not what I wanted.
In the following pic, this is a Blue LED, and in the pic, it looks approximately how I'd like it to look in real life.
But in real life, it is very much Blue Blue. The camera just cannot capture it.

IMG_20190802_200658.jpg

IMG_20190723_141351.jpgIMG_20190722_142751.jpgIMG_20190722_142825.jpgIMG_20190722_154125.jpgIMG_20190722_154127.jpgIMG_20190722_154151.jpgIMG_20190802_200658.jpg
Emitter designs by: WandererTJ

In real life it looked more like the left image than the right image:
IMG_20190808_175126b.jpgIMG_20190808_175126.jpg
So what did I end up doing?
For starters, I got some white LEDs. I liked them much more than the blue, just by themselves.
I also got some aqua spray and some light blue acrylic to use in an airbrush.
Screenshot_20190807-162521.jpgIMG_20190809_104524.jpg
I ended up not liking the results from the airbrush, but lightly spraying with the rattle can worked out great.
It's definitely something you should be delicate with, as things can go from acceptable to not very quickly as you can apply too much.
I was actually very worried after spraying them, because once again, it seemed too blue (just the lenses anyways), but once I put the white LEDs behind the LEDs, it was like magic. The white LEDs really pull back the blue tinting and give something I was satisfied with.

Future posts will show off the tinted emitters with lights on or off.

My Plan as far as all the individual lights, is to use these with CR2032 batteries:
Screenshot_20190810-012424.jpg
 
Last edited:
Finishing up the Paint - Part 1
This is a close approximate of all the painting supplies I used. Not shown is the 9+ cans of LeakSeal or however many it took to drown the undersuit in.
IMG_20190807_110609.jpgIMG_20190807_110617.jpgIMG_20190807_110627.jpgIMG_20190807_153635.jpg

Clear Coating Everything and giving some things some coats of LeakSeal and letting them dry too.
IMG_20190807_192120.jpgIMG_20190807_192131.jpg

By the time I was done making *almost* and had already painted nearly everything, I still hadn't finished the undersuit.
All I had left was the back details of the undersuit and the spine.
I had death1ink come over and assist me by drawing lines on the foam that I could use and interpret to make some back details that I was missing that I would also utilize as a zipper cover. It is glued to one side and velcros over on the opposite side of the corset.
The lines in it are etched.
I'm pretty certain that except for some programming and electronics that I did, attaching the spine plates was the very last thing I did.
Needed help from someone to mark where I needed to mount them so that they'd be spaced out properly.
IMG_20190809_185041.jpgIMG_20190809_233004.jpgIMG_20190807_011336.jpg

Speaking of LeakSeal earlier and the undersuit...
The idea was first given to me to use Plastidip... which I tried on the shorts.
Then Liquid Latex died with black acrylic paint..... which I also tried on the shorts, and honestly the amount of latex I was going to need was shocking and I would not have been able to afford it.
I was attempting to "skin" the upholstery foam as though I was trying to give skin to a movie monster. Same process.
And that was the goal, but I wasn't really seeing the results.

Finally I was suggested to use LeakSeal. After the first pass of using it, I was quite happy, but soon realized to to not be enough. The foam definitely soaks it up too much while you're trying to apply the surface.

I ended up going through several cans on each undersuit parts trying to clog up all the pores.

Somewhere, throughout this entire process, I can't even remember when it was... I thought the shorts were dry enough, and I excitedly put them on.
I moved around in them and everything looked so great.
Then I sat down in them.
It turned out that they were not dry at all...
The result effectively ruined them and a months work of trying to get them to be perfect.
The entire backside remained caved in and lumpy.
It brings me great shame, but I've lived with it and without most actually noticing.

I would like to recreate them eventually, preferably using a different method I've thought up that I won't be sharing until I can prove its success.
It's another Creature Skinning FX skill. I'm excited yet skeptical all the same.

IMG_20190804_214441.jpgIMG_20190804_214452.jpgIMG_20190804_214507.jpgIMG_20190804_214518.jpg
Pics 1 & 2: Visualization of not enough LeakSeal shown with/without light.
Pic 3: An example of how these are ALWAYS needing to undergo repairs.
Pic 4: What happens if you compress the foam while it is still soaking up the spray rubber.
 
Last edited:
he4thbar did you miss the suit-up video I posted here?

While my full armor set isn't finished in the video, it shows how I used to get into the undersuit.
It got more complicated as I added things.

This is the order I do things:
Corset on
Shorts on
Slide suspenders up through corset and onto shoulders
Zip corset
Knees on
Attach knee straps to shorts
Zip shorts closed
Turn on LEDs
Thigh armor
Shin/knee armor
Shoes w/ankle covers (assist welcome)
Boot covers over shoes (assist welcome)
Neck seal
Torso armor (assist welcome)
Biceps (assist needed) (pre-assemble with shoulders)
Forearms
Gloves
Helmet
 
Undersuit Finalization + Cod/Belt Final Paint & Decals
A Story of Red Dots

Belt/Cod/Tail Plate = DONE
Smoke Grenades = DONE
Corset, Undershorts, Knee Covers, Ankle&Shoe Covers= DONE

A lot of this was freehand. I actually learned a lot about tailoring clothes thanks to this, because there were many places I had to modify and take in to fit my shape.
For the longest time we have named the section of the undersuit that covers our stomach an "Ab Wrap", and it IS, if you want a gap between it and your torso :sick:... but when you correct that, which I did by adding a 4" (maybe it was more) band across the top, you find that this is in fact a corset.
I wear a corset guys! And its cool!

Making this has been both a learning experience and a nightmare. I'm pretty sure I spent literally all of May on just the undershorts... And I'm going to need to remake them. They are.... I hate them. I was given the wrong tips on glue and EVERY SINGLE SEAM has inevitably come undone. Going in and fixing seams doesn't leave a pretty looking piece. Its better to get things right the first time. Live and learn though.

In the end I learned a lot about monster/creature suit making. It's actually really epic to be using some of the same skills seen in movies, I just have a lot of room to grow.

The neck seal is also done, I applied some silver to the zipper but it rubbed off. I'm going to do it again and this time clear coat over it.

@Bungie why are there all these red dots? There are FIFTY red dots!
As an engineer, my speculation would be that each one indicates an impact sensor.
My costume will feature 42 of them, as the ones on the biceps/deltoids won't be visible due to my shoulder armor, PLUS I need at least 1 spot in my armor that breaths.
Note: The count of 50 Red Dots does NOT include possible ones on different helmets.

Armor Facts (Red Dots and more):
1)
The Corset has 6 Red Dots, and 4 white/off-white triangles (the front two of which are mostly always hidden below the belt-line)
2) The undershorts have 12 Red Dots
3) The Knee Covers have 5 Red Dots each (2 on the outer side, 2 on the back, 1 in the front)
4) The Armpit Covers have 4 Red Dots each (2 in front of the arm and 2 on the back)
5) The Neck Gasket has 2 Red Dots
6) The Upper Arms have 4 Red Dots each (2 on each of the buckle looking things)
7) The Torso Armor has a total of 4 Red Dots (2 on each side of the rubber section on the front side of the armhole.
8) The top-left & top-right spine plates have secondary colors on their tips.
9) There are also White Rectangular Decals I will go into detail about below.
10) All screw holes/detail go IN, this was confirmed at Halo Outpost.
11) There may be 2 (or 4) red dots unaccounted for in the texture file. The section of texture it is on does not seem to appear anywhere on the armor. It could possibly be the wrist or ankle. I also can note that there may be 2 that are hidden below the primary spine plate and above the secondary plate. The combination of these would bring the total to 56, not including helmets.

The White Rectangular Decal Locations:
1)
Torso Armor, Left Shoulder, Opposite the UNSC Letters Decal (1 Total, this section)
2) Belt - On each of the Hip Pockets (2 Total, this section)
3) Tail Plate - One across the Lower Center, then one on each of the gluteus pads (3 Total, this section)
4) Thighs - One on the lower back of each thigh (2 Total, this section)
5) Shins - One across the lower front of each shin, same spot as where there are 2 rectangle detail debosses (2 Total, this section)
Total in all = 10​

In order to achieve the effect that I did with them, I used white plastic tape, the kind you can find small rolls of in packs with yellow, blue, and red.
I cut all the strips to even lengths, then I hacked at them in different ways with my blades, trying to weather each one uniquely. I also tried to stain them up a little bit. Coffee would work best here, but I'm pretty sure I just used acrylic paint and rubbed it back off fairly quickly.

I have elected to skip the ones on the shins, due to their location over the detailed sections and having already weathered it.
If my armor was not already white, I would have likely included them.

I also elected to forego the one on the shoulder of the torso, and instead chose to personalize the area with my Spartan Number, S-128.

Lower Torso Completion Pictures:
IMG_20190812_183927.jpg

IMG_20190812_183927.jpgIMG_20190812_184011.jpgIMG_20190812_184018.jpgIMG_20190812_184023.jpgIMG_20190812_184057.jpgIMG_20190812_184144.jpgIMG_20190812_184148.jpgIMG_20190812_184204.jpg

Smoke Grenade Completion Pictures:
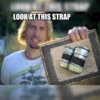
I weathered the strap that holds them. Look at it! :lol:
It's important when you are making an aged costume to ensure that you don't overlook minor things, even if they are as simple as a piece of elastic. I used some burnt sienna for color and a lot of 220 grit sanding for it.
IMG_20190812_184242.jpgIMG_20190812_192814_228.jpg

Undersuit Completion Pictures:
IMG_20190812_184406.jpgIMG_20190812_184558.jpgIMG_20190812_184629.jpgIMG_20190812_184642.jpgIMG_20190812_184648.jpgIMG_20190812_184651.jpgIMG_20190812_184711.jpgIMG_20190812_184818.jpgIMG_20190812_184825.jpgIMG_20190812_184827.jpgIMG_20190812_184918.jpg

A Focused Highlight on Red Dots:
Please note, I jumped a little ahead here to post these. When I discuss the completion of the torso, I will note the fact that I needed to close a gap in the undersuit in the upper back. In these photos I have already completed that.
IMG_20190812_220122.jpgIMG_20190812_220142.jpgIMG_20190812_220445.jpgIMG_20190812_220506.jpgIMG_20190812_220510.jpgIMG_20190812_220531.jpgIMG_20190812_220620.jpgIMG_20190812_220623.jpgIMG_20190812_220632.jpgIMG_20190812_220641.jpgIMG_20190812_220656.jpg
Reference:
It is the weird brownish section, below the thigh and above the neck gasket on the left side of the image that I've never been able to identify.
Mk V Undersuit.jpg
 
Last edited:
Leg Armor Finalization
Thigh Armor = DONE
Grenadier Knee Armor = DONE
Shin Armor = DONE
Boots = DONE

Let there be lights!!! And magnets!!! And random objects to keep armor from tipping over!
When you wear white, you best expect to get a little dirty!

The thighs here are a great example to show off what I do on the backside of my foam.
I don't want people to know my armor is foam when they get a glance of me or even if they are looking at me up close. If someone catches me at a weird angle, I don't want them seeing the puzzle mat texture, so I take my dremel to every edge.

If you're curious as to what the caution labels say, be sure to check out my previous post, "Decals Decals Decals".

While my thighs are covered in velcro to attach to my shorts, I honestly don't love it. It could be done better.

Thighs:
Armor Facts:
1)
Each Thigh has 1 Warning Label, 2 Yellow Triangle Decals, 2 White Triangle Decals, and a White Rectangular Decal
2) All Shield Emitters are striped horizontally for both thighs
3) The most commonly used 405th Thigh file has the front section bend out from the side with a 30 degree cut. Don't do this, it is not present in the game model. Make the recessed section, but don't bevel your cuts.
4) All screw holes/detail go IN, this was confirmed at Halo Outpost.
Grenadier Knees, Shins, and Boots:
Armor Facts:
1)
Each shin has 2 Black Triangles (Lateral Side only), a Warning Label, and a White Rectangular Decal (Not shown here).
2) I tend to avoid weathering the black sections as much as possible, as I view them all as rubberized pieces.
3) There is a recessed area on the back of the shins, in my photo you will note there are 2 of them, there should only be 1. The correct recess is on the lateral/outer side.
4) The boots each have a caution decal that is often free-floating on the model, causing its placement to change constantly. Most often it is shown over two recessed details on the ankle plate. I was able to achieve the result of that look by using a semi-transparent waterslide decal over those details.
5) There is an often overlooked recessed detail in the center of the ankle plate, this should help you identify which boot is which.
6) All screw holes/detail go IN, this was confirmed at Halo Outpost.
IMG_20190809_182351.jpg
IMG_20190809_182403.jpg

IMG_20190809_182351.jpgIMG_20190809_182357.jpgIMG_20190809_182403.jpgIMG_20190809_182411.jpgIMG_20190809_165253.jpgIMG_20190809_171851.jpg
 
Arm Armor Finalization
Biceps = DONE
Forearms = DONE
Gloves and Handplates = DONE
CQC Shoulder = DONE
Commando Shoulder = DONE

Armor Facts:
1)
The left bicep has yellow triangles on the back while the right has black ones. This is game accurate.
2) The Shield Emitter (LED Diffuser Lenses) have vertical segments on the left bicep and horizontal ones on the right.
3) The forearms are the only armor piece seen to have some sort of screw heads in their detailing, everything other armor pieces just have circular debosses (recesses). The debosses were confirmed with on the official Halo Outpost armor.
4) The forearms each have 2 small triangular decals near the wrist. There is a triangular symbol towards the rear of the forearm. I honestly couldn't tell if it was a decal or what, so I simply taped the area off and painted them on. Key word here is Triangular, not Triangle. You want to effectively remove the tips of the triangle.
5) In reference photos, the outer/top side of the forearms have a "V" on them in some pics. It has been discovered that the "V" only appears when a secondary color is selected in multiplayer. It otherwise is just a "\" essentially just a scratch, not a detail, and can be skipped.
6) I hit both backsides of the upper forearm panel with some blast marks, but it seems that you only need them on one side, it is not mirrored.

Personal Armor Facts:
1)
The left shoulder piece, the CQC armor, features a panel that can be removed to reveal a QR code. The QR code takes you to my Linktree, which leads you here, Facebook, my 405th thread, and a few other things. This was a fun idea up until I put my torso on and found out I cannot reach it.
2) The right armor piece, Commando, features a custom symbol I designed based on the bland Omega Team one.
3) Both shoulder pieces are in fact removable to allow for other shoulder armors to be attached if do desired. The hole pattern is a little wonky though, so these two shoulders are not reversible.

IMG_20190812_182857.jpg
IMG_20190812_182955.jpg

IMG_20190812_182839.jpgIMG_20190812_182857.jpgIMG_20190812_182918.jpgIMG_20190812_182955.jpgIMG_20190812_183008.jpgIMG_20190812_183025.jpgIMG_20190812_183041.jpgIMG_20190812_183109.jpg

Some detail shots of one of my forearms, this one had severe "painter's tape weathering" so I did not add the triangular detail on the backside.
I see a lot of people forgetting to add the details into the sides of these. The best shaped models here on the forum are missing the details, you can add them in with 2mm foam or etching them in.
Please keep in mind as you look at this up close, this is one of the first things I made, it isn't the prettiest.
IMG_20191005_175929.jpgIMG_20191005_175941.jpgIMG_20191005_175953.jpgIMG_20191005_180005.jpgIMG_20191005_180449.jpg

NOTE: Cover up your LEDs with foam, otherwise weird places like your armpits might glow. Fixed in the 3rd pic.
IMG_20190811_120207.jpgIMG_20190811_120225.jpgIMG_20190812_183241.jpg

This is a custom design I came up with, based on the actual Team Omega version.
I had very much intended to do a dried and crackled blood effect, but I rushed and did not allow the crackle medium to set enough to achieve the effect. Still proud of what I was able to accomplish with a stencil I cut out if printer paper though.
There were some unwanted runs of paint in places, and I took a wet paper towel and the edge of my blade to clean troubled spots up.
IMG_20190809_092539.jpg

WHAT THE HELL IS THIS? Now we have to paint the inside of our forearms at the wrist? Thanks TJ.
Yep, it would seem so, sorry guys.
reach_12014044_Full (Roadwarrior) - Copy.jpg

Posting all this stuff, not even getting replies... :(:cry:
 
Last edited:
Torso Armor Finalization

Armor Facts:
1)
The front side of the chest and the shoulders have been altered to meet my artistic wishes of combining Mark V designs, new and old.
2) See those yellow triangles above the arm holes? Yep, they go there. There are also the 2 white triangles at the front of the arm holes, and the 4 black triangles at the bottom of the arm holes.
3) I created a custom military stencil font for the backs of the shoulders. 99% of the time Bungie used a normal military stencil font for the UNSC lettering that you see everywhere, this is the one spot that DOESN'T use it. The other shoulder should have a White Rectangular Decal, but I elected to personalize things and use my Spartan Number in that location instead.
4) Diaphragm Plate and Controls - there are no good files, not even game ripped ones. The plates were fully freehanded and the control box I personally modeled. You might disagree with my use of LEDs on this, and that's okay. When I look at my references, that's how I see them, treating them like stickers seemed like a cop-out when I could instead add more flavor to an otherwise overlooked section of armor.
5) Remember how I mentioned red dots? There are 12 just on the torso. (NOTE: I believe I have since discovered 2 more on the arm hole covers which should be on the lower side of the hole, which you can see in the previous post about the undersuit finalization.) Here I am counting 2 on the neck seal gasket, 3 on each arm hole cover, and 2 on each breast near the arm hole covers.
6) Diffuser Lenses (Image #14 of the thumbnails) - Known to be the Shield emitters in the game, many don't know that these are segmented and have lines through them. They aren't all symmetrical either! Only the ones on the thighs are. Some have vertical segments, others have horizontal segments. These were all 3D modeled by me to be more accurate than any previously seen build. All lenses were printed clear and sprayed to accomplish a light blue shade with white LEDs behind them.
• Front Left Breast - Horizontally Striped​
• Front Right Breast - Vertically Striped​
• Lower Breast (Both left and Right) - Horizontally Striped (Long stripes)​
• Middle Upper Back (x2) - Horizontally Striped​
• Lower Back (Left Only) - Vertically Striped (Long Stripes) - Be wary on this one, these details are so fine that they may not print well.​
• Lower Back (Right Only) - Horizontally Striped (Short Stripes)​
• Spine Section - Horizontally Striped (just trying to get these to light up is already enough of a pain that I wouldn't worry about it)​
• Set of 3 on Right of Back - All Horizontal - Be wary on these, the details are so fine that they may not print well.​
• Black Electrical Panel (Left) - Horizontally Striped​
• Black Electrical Panel (Right) - Vertically Striped (Note, I have 1 reference where they are flipped, don't ask me why or how it happened, but in most other references, the electrical panels are orientated this way)​
7) Warning Label, check the top of the spine, this is one of those unintelligible ones you can make up fun things for.
8) Caution Triangle Thing - This one is at the Top Right of the Back, also unintelligible

I also used some different greys throughout the armor to provide some depth.
Really, what I wanted was to give them a leathery/rubber grain texture like you see in the game, but after expirimenting with the effect on my boots, I decided to drop it.

Outdoor Photos:
IMG_20190809_140732.jpg
IMG_20190809_140624.jpg

IMG_20190809_140732.jpgIMG_20190809_140811.jpgIMG_20190809_140738.jpgIMG_20190809_140756.jpgIMG_20190809_140618.jpgIMG_20190809_140624.jpg

Indoor Photos:
IMG_20190814_013204.jpg
IMG_20190814_013146.jpg

IMG_20190814_013204.jpgIMG_20190814_013259.jpgIMG_20190814_013309.jpgIMG_20190814_013355.jpgIMG_20190814_013155.jpgIMG_20190814_013146.jpgIMG_20190814_013407.jpgIMG_20190814_013323.jpgIMG_20190811_205244.jpg
These two show the inside of the back. With 1 exception, I'm using coin cell battery holders, but I do have a power bank for a future attachment I'll be adding. The Spinal lights were a nightmare. I've also had one go out, but I poured enough hot glue in and over all the LEDs that I don't think fixing it will be a possibility.
IMG_20190814_084251.jpgIMG_20190825_195757.jpg
 
Electronics - Part 2
The Armor Ability Module

Along with my other 3D Prints, I was surprised with this one. (This is the surprise I mentioned earlier)
This was a fun project my friend Geoff and his girlfriend Alex helped me with. When you put 3 engineers together, cool stuff happens.

For those that aren't familiar, this is an Ability Module from Halo Reach. Halo Reach was the first game to introduce abilities in the form of Sprinting, Invisibility, Armor Lock, Drop Shield, Hologram/Decoy, Evade/Dodging, and Jetpacks.
While you could start the match with your chosen ability, custom games allowed swapping these on the fly as pickups on the map.
Their respective colors were: Green, Cyan, Orange, Light Blue, Yellow, Purple, and White.

Towards the middle of the video (approx 24s), you'll see the LEDs flash and spin.

For this I used a programmable Neopixel ring and 4 Standalone Neopixels.
I could have stuck with a single color, but that's no fun. When you have LEDs that can change color, why not have ALL THE ABILITIES?!?!
The code is set up so that ideally only the people who are actively paying attention notice the colors change. The intention that I wanted is if you ever see me twice, it'll likely be a different color than you saw me last time.
When the color cycle completes I have it spin and flash, not because it did it in the game, but simply because I thought it be cool. Hey, if you have all the power, you need some cooldown times as well.
I wanted to do more, but legitimately ran out of memory on the card I used.

Speaking of which, my original power supply proved to be not enough for the code to properly run. It still works and it turns on, but running the second set of Neopixels through serial connections causes issues when you're just running 5.5V via 2x2032 batteries.
I resorted to plugging into my 20,000mAh portable USB charger which you can see attached to my back in the previous post.

I didn't do anything fancy to mount this, It just has elastic straps with velcro sewn on the ends and it slaps up in front of my primary spine plate, fastened to the torso. They do scuff paint off of eachother which sucks, but... oh well.

This thing also has A LOT of little decals on it, which were quite hard to accomplish.
This model that I have isn't 100% accurate, so it made it less pressing.
I'll have to make a better one eventually, but I'm not complaining! Very thankful! :)
IMG_20190625_190444_989.jpgIMG_20190625_190447_308.jpgIMG_20190625_190449_742.jpgIMG_20190813_183305.jpgIMG_20190814_084108.jpg

Finished Ability Module:
Last picture is showing it in the "recharging" part of the cycle
IMG_20190814_012326.jpgIMG_20190814_012337.jpgIMG_20190814_012417.jpgIMG_20190814_012433.jpg

A look at all of the Torso's Lights in the Dark:
IMG_20190813_210645.jpgIMG_20190813_210650.jpgIMG_20190813_210716.jpgIMG_20190813_210733.jpg


The Programming that was used:
Enjoy some free code, if you use it, credit goes here.
Screenshot_20190812-004801__01.jpgScreenshot_20190812-004855__01.jpgScreenshot_20190812-004934__01.jpgScreenshot_20190812-005032__01.jpg
 
Last edited:
Pre-Outpost Suit-Up 1
My body is ready!
Can't wait to slay some Covvie scum!

Well the spine and back details were the very last thing that I made. I had assistants on both occasions help me. Nailing that down was the last thing I needed before a full suit up.

Wait... I'm missing something, what am I missing?
IMG_20190810_093727 - Copy.jpg
IMG_20190810_093733 - Copy.jpg

IMG_20190810_093710.jpg IMG_20190810_093711.jpg IMG_20190810_093713.jpg IMG_20190810_093722.jpg IMG_20190810_093727.jpg IMG_20190810_093733.jpg

Getting into character...
I haven't really posted about it much here, not since the beginning, but this 6 year journey all started off with completely changing my body. I lost 35 pounds and dropped from more than 23% body fat down to below 10% AND for all this time, I've kept at it. Yes, I've had periods where I've missed the gym, and yes I've had weight fluctuations, but I've kept at it.
And since my body is part of my character, so is my hair, I want to achieve a full aesthetic that my character is. I want the armor to fit right and look good on me and I want to look like a war hardened Spartan.
For that, I'll be rocking a "war-hawk" mohawk. Its that kind of infantry style that you get in the barracks at your outpost, where command isn't sitting there making sure you have that fancy high and tight. My personal mohawk is actually fairly heavily influenced by Soap from CoD. He happened to be in all the google images I was looking at and that's what I told my stylist that I wanted. Wasn't trying to be Soap, but happy to unintentionally be mixing fandoms.

I value a pre-con-cut, especially as a spartan, because the ancient spartans would groom and clean themselves before going to battle. It was a ritual they underwent, preparing themselves in case they died, essentially performing their own undertaking service. While ancient spartans were interested in a Beautiful Death, Halo spartans never die, they are just missing in action.

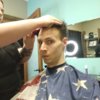
I've gotten to the point where I get skin-fades on the side where I go below a 0 and use a foil. Credits to the sister for the cut!
I'll also be adding makeup to myself so that I can freely take my helmet off and still be in character.
IMG_20190814_190726_264.jpg IMG_20190814_190726_270.jpg IMG_20190730_133937.jpg IMG_20190906_231058.jpg
 
Last edited:
Spartan Identity

Spartan Identity
• Spartan Bio
• Spartan Backstory
• Spartan Profile Card​

NOTE: I want it to be clear that I am accepting all criticism to my backstory. I've done my best to ensure that given what we know in the Halo Universe, that all dates should make sense in the timeline that I provide.


Spartan Bio & Backstory
S-128: Ansgeirr (WandererTJ) | Spartan-II Class-I || Special Projects: Operation-Ω | Rank: Team Leader || Oklahoma​

Character Bio:
Listed as one of the thirty candidates that died during surgical augmentation, SPARTAN-128 was enrolled into a side project of Dr. Halsey off of any record.

Primary Objective:
S-128's mission is to find all Spartans listed as MIA and recover any that are alive by any means necessary as according to Operation-Ω.
Operation-Ω:
- Determine the final status of any and all missing Spartans by any means necessary.
- Recover the bodies of any and all missing Spartans, live or dead, by any means necessary.
- Remain undiscovered by both human and covenant life by any means necessary.
- If a Spartan is missing, find them.
- If a Spartan is alive, recover them.
- If a Spartan is dead, avenge them.
- Do not let Mjolnir armor to be taken or used by the enemy.
- While behind enemy lines, research and obtain additional information about enemy home worlds and their sciences.
- Find your fallen brothers and sisters. Finish the fight. Spartans never die...


Squadron Details:
Under Operation-Ω (Omega), nicknamed as both "Operation End-Game" and "Operation End of Line_", SPARTAN-128 leads a squad of ODSTs that refer to themselves as the "End-Game" squadron.
They refer to themselves as such because of Omega's literal meaning to be "last" and because their mission is to determine the 'final' status of all Spartans whose whereabouts are unknown. To withhold the idea that Spartans never die, all Spartans discovered to be deceased are still listed as MIA. Due to this, the End Game Squadron consider their main objectives to be both retrieval and justice for their fallen warriors.
The never-ending and seemingly hopeless search for other possible surviving Spartans, is a fatiguing search both mentally and physically.
It does not help that this squad and operation are not officially listed on any records, meaning that a redundant instance of Operation-Ω can exist officially on record. If discovered by the enemy, UNSC forces will lay no claim to the knowledge of their existence.
While they do value all forms of life and operate in the dead of night to avoid detection, there is speculation that this squadron has been known to wipe out entire regions of indigenous life when they discover a fallen Spartan; only leaving behind an omega symbol in the blood of the creatures that inhabit that region.
--This is one of the few signs that the squadron may have deteriorated mentally due in part to the severity of the conditions that they must operate in.

Their secondary objective is to obtain all additional information that they can while they are located on Covenant home-worlds.
In an investigation of Eayn, the Kig-Yar home-world, S-128 dissected several of the species in order to discover how their point-defense-gauntlets functioned. He succeeded. The squadron's translator was also successful in recruiting two Kig-Yar siblings to join the quest. It wasn't hard to convince them after freeing them from the prison they were in..... The two Kig-Yar are currently outfitted with modified Sangheili Orbital Ranger armor.

Still in search of the Spartan Grey Team, the squadron's next target was the home world of one of the most devastating Covenant species. S-128 was determined to discover how the creatures fired "death" from their hands, and was determined to find a way to harness that power to be used in tandem with a point-defense-gauntlet.

Squadron's last known location: Te of the Svir system, home planet of the Mgalekgolo.
Due to the severe conditions of the planet, the standard ODST gear would not permit the squadron to operate on the surface of the planet; S-128 went alone.

Spartan Details:
SPARTAN-128 is a close combat expert, stealth expert, and an assault specialist. He is extremely proficient in hand-to-hand combat and is highly skilled behind a shotgun.
When not taking advantage of the Type-3 Refraction Dissonance Modifier/Camouflage Module his armor is equipped with, he finds use in flanking the enemy and serves as the aggro member of the squad, drawing fire when necessary. He also serves as a front man for defensive scenarios, in breaching scenarios, and other otherwise scenarios where small passageways are taken.
S-128's squadmates know him for the arsenal that he carries with him: a M45TS Tactical Shotgun, a Suppressed M7/Caseless Submachine Gun, a Custom Model 6H PDWS Magnum Sidearm, 3+ knives of various sizes, and during some occasions an Odachi Great Katana.
"A sword, by any other name, is simply a key... and when you stick it into your foe, it unlocks their death."
S-128 is also trained as an Engineer, in order to subvert, reconstitute, and/or operate any and all equipment and technology whether it be domestic or foreign. He always has a secondary objective to find ways to reverse engineer any and all newly discovered enemy ordinance.
While he typically uses a drop pod like his fellow ODST squadmates, S-128's armor, like that of other Spartan-IIs, is equipped with an orbital drop armor locking system. This allows his person to fall from space or from upper-atmosphere and survive the landing... though he needs to be assisted out of the armor lock after more severe impacts.
Although it is dissimilar to those in his squadron, S-128 also wears an ODST helmet. It is a highly upgraded Mjolnir variant of the helmet.
Full specs on the appearance of S-128's armor and weapons can be found in detail [here].

While active in his squadron, S-128 has also been referred to as "S-128-Ω", "Wanderer", which was a nickname given to him by his classmates while he was a trainee in the Spartan-II program, "W28", his HUD sign to his squadmates, which is a combination of the nickname and his Spartan number, "Omega", since he was the last of the original Spartans in the Spartan-II program to make it into active duty and because he leads Operation-Ω, and in battle he goes under the call-sign "AHNZ".

It is rumored that during his candidacy, it was discovered that he was afflicted with a condition known as ADHD, which had been removed from human genes in the 23rd century and was originally overlooked during the screening process; Halsey purged S-128 of his "condition".

Spartan Backstory Details
UNITED NATIONS SPACE COMMAND
0256, 15 June, 2558
CLASSIFIED: ONI DIRECTIVE
EYES ONLY​
FROM: //CLASSIFIED//
TO: █████████████
RE: File on subject believed to be alive in regards to Dr. Halsey's investigation.

This is everything we have on the individual known as S-128, birth-name Ansgeirr, who was one of the subjects in Dr. Halsey's initial Spartan-II program.​

://ONI Personnel File//:​
-->> BEGIN PERSONNEL FILE <<--
NAME | [REDACTED], ANSGEIRR
UNSCID | S-128
DOB | FEBRUARY 6, ████
BIRTH PLANET | //CLASSIFIED//
BLOOD TYPE | O-POSITIVE
HEIGHT | 6' 5" (EXPECTED TO BE 6'8" IN ARMOR)
WEIGHT | ███-lbs
RANK | //CLASSIFIED//
STATUS | UNKNOWN

-->> PERSONAL PROFILE <<--
S-128 was taken by Dr. Halsey at the age of 7. In his youth, this would-be spartan often followed and assisted Dr. Halsey with her experiments. The child's full name was Ansgeirr Y...̴.̶̤̹̹̪̤͓.͔͙̻͎͓̜͈..̧͉͎͔̗.̹̼̼͕͟.̠͖̹ͅ.̸͈͉̣̱͖̭̫͝.̷̴̯̥̣̪̼̰̻̘ͅ.̧̭̺̠̝̪̫̩͘.҉̢̛̳̖̦̖̩̥̞̯͓̣̜ͅ.̨̝̰̖͙͖͓̹̻́͜.̴̪̼͚̠͇͇̺̺̩̳͚͇͟͟͠.̷̡̜̺̦͖̜̟̲͖͓͟ͅ.̩͖͖̪͕͇̫̖͓̼͙̭͢͞ͅ
Ę͎̠̤R̮̰̙̬̮ͅͅR͚̥̺Ǫ̘̳͉͚̼͚R̬̜:͙̫̝̼̹͕́ ̲̯̙͢ͅFi̴l̵̻̜̻̱̼̟e̳̦͓͕ ͓̙R̲̱̦͖͍͕ͅe̵p̩͜o̫̠͔̠̖͇̕ͅr̡̜t̳̯̫̙̼e̱d͈̥ ̘̹͓̙͕̱̟a̜͚s̩͈̫͇͟ ͉͍͙̝ͅT͚͓̥̙̫a̢̹̝͕̦ḿ̫͉͕p҉̼̪e͖͓͞r͎̯͔̲̙̦ͅe̥̲͈͙͕̣͝d̸̘̫͓̭̟̳̘
\\̡̮̺͉*̡͔̪̟*̣̠͕̻̝̀D̠̙͎A̳͖̖̩TA͚̭͈.̮̖͓̙͈̥̥Ŗ͎͔͖͚͚͉̲E̘̭͈̼͡M̗͖̖̙̕O͓̜̩̜̺V͍E̗Ḏ̳.̣̬͚C̯͍͉ͅL̴̮̙̠̱̩̜A̴̙̳͕͖̭Ś̘̺͇͔̩̪S̖͢:͙͇͓͎̮͚͜O͉̯͔̭N͈̲̪̻͙̙͔Ḭ͔͎͕̝̹͇.̤̰͕TI̗̰̬͎͜ͅER̘̥̜̳͜.̵̖̫̮1*̼̼͕̫̀*͓̮̝͍̜/̧͈̜͉͙̫͍/̸̬̜̙
̪̗̻̺͍̀ͅE̖̝̪͖R̰͇̲̣̼R̡̼̻̦O̠̲̻̗̙͈̱͝R͓̼͎̮͓̺:̦̜̬̪̜̤̠͜ ̬̙D͍a̶̘ͅt͍̰͔̫͝ḁ̶͕̠̳ ̨̟͇̫͙l͕̻̰͚̬o̘̙͉͈̮̞̦s̯͍͜ͅs͕
͏͍̥͈͉̳ͅE̖͔̮̝͢R̥͈ͅṚ̹̺͙͍̣͘O͎͖̞̬͜R̺̜̺̣̜̖͝:̮ ̻͡ͅF̯̺̯̦̼͕̲͘i̩̻̖̬l̵̼ͅȩ͎̦̼̤ C̬͇͓̦͖̭o̞̼̞̺̝̰̘͘r͖͎̭̰̜ru̙͟p͕̲͓̬t̶̤̻͚̰͍e̝̲̠͎͢d͏͔̻̙
I̫̟̖̥ǹ̥̭̥̥̖̞f͉̥̩̻̯͝o̗̙͔̜̮̬ͅr̞͍͔͡ḿa̳̯̝̘̹ͅͅti̝͍͞o̸̰̗̤ṉ̷̠̩̱ ̧̱͙͚͚̜̦͈p̰̬̱u̻̩͉r̜̼̤͔̝͈g̭̫̝͎̙̰ͅe̛͉͔͖̮ḓ̺͚̻.̦̫͓͔̻̕

Information recovery: Final entry, Dr. Hals̪̱ey̹̳͎:
The pat̩̺̥́ient, coden͈͎̦amed S-128, was confirmȩ̼̣d d̦̲̬̱͍eceased. Age 15. Ca̞̯̕u̹̙͉͖̞̯s̵̹͚̠e: Sur̢̫gical Aug͉̖̰̺̣͉͞m̸͖͕͇ͅentation. Time o͘͏҉f death: 12:51͈̠PM 3͙͖͕ͅ1̜̣-AUG-2544. Di҉͉͍̖̺e̮͡ͅd̫͎̘̥̳̭̗ on a Monday.
The details above are only known remaining details about this individual that were recorded.
://END FILE//:​

Sorry that there isn't any more, Dr. Halsey was very thorough with this one.​
Yours,​
//CLASSIFIED//​

://END TRANSMISSION//:


Code:
://ONI Sector Zero Tier Zulu Restricted Access//:
ONI1:~> $ User Login: Zulu1
:/$ su root
:/# cd /P1S0TZ/Ω/S128
:/# S128
User Access Granted_
To access Full Profile and Uncorrupted profile entries, see the [sealed report].

Opening Report...

[sealed report]


Uncorrupted Details: Deleted Logs/Entries and Notes that were Undocumented in the System

Entry 2517, Aug 28th - Keyes:
Halsey and I met with candidate #128 for the program. He seems exceptionally gifted and easily passed all the tests that Halsey conducted, though I can't shake the feeling that when he looks at me, brief as it may be, it seems as though he is looking through me. I don't think we've seen a candidate yet with spatial awareness scores that can match his.

Trainee 128 Log 1:
S-128 was taken by Dr. Halsey at the age of 6. The child's full name was Ansgeirr Yngvirr, and he was born February of 2511.

NOTE: Name Details -
Literal Translation: Old Norse to English: Ansgeirr (AHNZ•GEER) - derived from Ans for 'god' and geirr for spear: "God-Spear". Yngvirr (ING•VEER) - derived from Yngvi a god, referring to either Freyr or Freya and varr as "VAR"/"HER" meaning warrior of/defender of.
- Ansgeirr Yngvirr: "God-Spear Warrior of the God/Goddess Freyr/Freya"

Trainee 128 Log 3:
Age 6: Some of the children have formed groups, while others have remained distant and closed off to one another. Though it would seem that S-128 is like the other youths that close themselves off, he's a bit more complex than that. It seems that Frederic-104 and S-128 do not get along, though they cope with being around one another. While some of the closed off children eat alone at lunch, S-128 can often be found sitting next to Sheila. The two seem to find comfort in each other even though they are never seen speaking with one another.

Trainee 128 Log 2:
Age 7: This would-be future Spartan often follows Dr. Halsey around and does what he can to assist her with her experiments. He does this in lieu of playing with the other kids. While there are certain concepts he is still unable to grasp, he seems to understand a great deal of what is going on.

Entry 2521, Jul 1st - Halsey:
Age 10: S-128 seems to have developed symptoms of condition that we have not seen in several generations. Shockingly, it seems as though I overlooked this during the gene-candidate pool stage.

Trainee 128 Log 4, 2521, Sep 23rd:
Age 10: S-128 has been purged of his condition.

Trainee 128 Log 5:
Age 11: S-128 has been given the nickname "Wanderer". During a small-squad SERE recon training mission against the rest of his fellow trainees, after becoming the only remaining "survivor" of his squad, S-128 managed to not only lose the other team, but disabled all the tracking sensors we had placed on his person. It wasn't until a week later that we picked him up; he seemed to just be wandering out further and further. He said that he was looking for a real enemy confrontation. We have listed this as a heat stroke even though it was not. It seems as though there is something that Halsey is not telling us about... She kept herself locked up the entire week, blaming herself for something; she seemed like she was about to break. Needless to say, the entire staff is on edge and we are jumping to her every move after that screw up.

//CLASSIFIED//
Trainee 128 Log 6.0
The procedure to cover up certain secret projects is commencing today post surgical augmentation. While some of the trainees might be listed as deceased, some of them 'should' actually very much alive and well...
We must not be discovered by ONI.
//CLASSIFIED//

//CLASSIFIED//
Trainee 128 Log 6.1
Sadly it would seem that there were actually some unexpected complications during some of the surgical augmentation procedures. Some of the trainees were actually lost... We are placing both those that have survived and those that have not into cryo-suspension. Halsey believes that we might actually be able to resuscitate some of those that were lost, but we just don't have those capabilities at this point in time... She has some of us convinced, I just think that between those who are actually deceased and those that are simply listed as deceased, keeping them all in cryo is a good way to hide the ones who are alive in plain sight. I think Halsey understands this too, perhaps she just simply wanted to give us hope that we didn't kill some of these kids.
//CLASSIFIED//


Trainee 128 Log 6.2, 2525, Mar 9th:
The patient, codenamed S-128, was confirmed deceased. Age 14. Cause Surgical Augmentation. Time of death: 10:51PM 9-MAR-2525. Died on a Tuesday.

Entry 2525, Mar 9th - Halsey:
I regret that I purged S-128 of his condition. The only time he spoke after the event was during his training missions. Today he has watched as 29 of his classmates have died from the surgical augmentation procedure. He did not hesitate when his number was called.
While I decided early on what would be of him after this, I hope he is still ready. He will be placed into cryo-suspension, he will not be in attendance for the graduation ceremony with his classmates that survived the procedure.

Entry 2543, Jun 22nd:
Although there have been several candidates for a 2nd class of Spartan-IIs, we have only been able to train a few. Nicole-458 has been training with standard instructors for 6 years in the program. She is doing well, but without being able to train with and against a fellow Spartan, in the end, she won't be nearly as good as any of the original class. Halsey is nearly done with S-128's secondary level of upgraded augmentations, and she is almost nearly done with his specialized armor. Operation-Ω is not due to begin for another few years, but Halsey agrees that S-128 needs to be brought up to speed before he jumps feet first into hell. Alive or dead, we've lost many spartans in these past few years. Due to these developments, S-128 is getting defrosted. A flash clone is being placed into S-128's cryo-chamber in order to keep up appearances. Age: 32, Cryo-Age: 14.

Entry 2543, Jul 15th:
Age: 32, Cryo-Age: 14; S-128 assists in the training of Nicole-458, a new Spartan-II, for whom the two of seem to share a bond.

2544:
Age: 33, Cryo-Age: 15; S-128 receives the report that Sheila has fallen in the Battle of Miridem and that Dr. Halsey has been captured by Thel 'Lodamee.
Hearing this news S-128 deploys himself, attaching himself to a F-98 Wombat Drone prototype that he has hacked into.
He approaches the space battle relatively unseen, as the covenant forces are focused on their efforts against Blue Team, led by John-117, who were already on their way to recover Halsey. While S-128 is unable to make it to the battle in time to help with their efforts, he was able to manage to connect with the upper side of the flagship just before it jumped into slipspace. S-128 was not heard from until a Covenant Phantom crash landed back at our facility. We feared the worst and had the ship fully surrounded within seconds, but it was S-128 that emerged, Thel's head in hand. S-128 confirms Sheila, Solomon-069, and Arthur-079 as KIA.

2544:
Age: 33, Cryo-Age: 15; Soon after the event and S-128's return, Halsey in hope to redeem herself to S-128, approached him about his AI chip; a chip for which it would seem that Halsey had preserved a sample of Sheila's brain tissue for the AI. This was the first time S-128 had shown any emotion in front of Halsey for a long time. He accepted the AI Chip. Even though Sheila died at the age of 33, her hologram appears as the youthful version that S-128 knew.

2544:
Age: 33, Cryo-Age: 15; Halsey completes the specialized armor for S-128. However, he cannot wear it without receiving his secondary level of augmentations. For now, he is still limited to standard Class-I Mjolnir armor.

2545, January:
Age: 33, Cryo-Age: 15; Halsey completes the final augmentation upgrades and applies them to S-128, who survives the procedure successfully. The next day, he suits up for the first time in his own personal armor.

2545:
Age: 16 (34); Nicole has successfully made it through the augmentation procedure and graduates due to the help she received from S-128. Although all information on S-128 is still to be left unrecorded, today also served as his graduation, since he was forced to not attend the graduation with his original class.

2545:
Age: 16 (34); Soon after Nicole's graduation from the Spartan II program, S-128 and S-458 form Fireteam Spartan Black II.

2547:
Age: 18 (36); Due to a jealousy of "Sheila", Nicole disbands FTS-Black-II and returns her armor to green. After Nicole disbands the squad, S-128 operates solo for a time, with only Sheila by his side. S-128 deploys in search of Spartan Grey Team, but is only met with failure. This year also marked the revealing of the Spartan-II program to the public but S-128 is still undisclosed to all outside of Operation- Ω.

2552, Jul-Aug:
Age: 23 (41); S-128 deploys to Reach, in order to assist in the front lines.

2553, January:
Age: 23 (41); S-128 begins searching for John-117. S-128 is assigned a full squad of ODST troopers to assist him in searching out fallen spartans. During down times, the
ship is led by JD, Private First Class ODST, while S-128 is put into cryo sleep.

2557:
Age: 24 (45); After receiving reports that Master Chief, John-117 is alive and well, the End-Game squadron goes back to searching for Spartan Grey Team.

2558:
Serin Osman, former classmate of Ansgeirr-128, becomes Commander in Chief of the Office of Naval Intelligence.
Serin had known about the existence of certain special projects and operations that Halsey had conducted/started with some of the other Class-Is. After discovering that the individual located in S-128's cryo-locker (on the facility holding all the spartans who were iced) was a flash clone, and even though Serin could not dig any deeper, SPARTAN-128 is now considered to officially be a Top Secret ONI Operative and Asset by issue of Section Zero priority class Zulu, and all files and archives pertaining to S-128 have been seized and sealed by Section Zero. Whereabouts of S-128 are unknown.


Spartan Profile Card
View attachment 222433

Transparent (Original) Version:
View attachment 222435

I have written a tutorial for anyone else interested in making a Halo 4 Bio Card for themselves.
You can find the tutorial here: http://www.405th.com/showthread.php/41917-TUTORIAL-Personalized-Halo-4-UNSC-Bio-Cards-(Image-Editing)


There's a thread for back stories!
 
There's a thread for back stories!

I've actually been completely re-writing it and I'm doing my best to rework all the documents to be presented as a story to my 343i contact.

With all the virus stuff, if leaves me contemplating life, and... just, well... if I died, I'd absolutely want a 405th send off in costume, but I've been working hard to make my character legitimate, every part of the story I've worked into the realms of in-unverse plausibility, and I'd love to have it recognized by 343.

If you want to read what I've got, message me on the Discord. Profreads and opinions always welcomed.
 
Status
Not open for further replies.
Back
Top