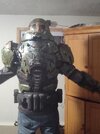
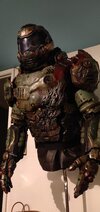
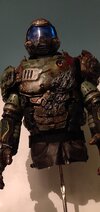
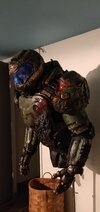
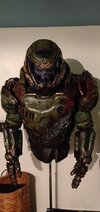
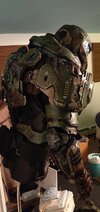
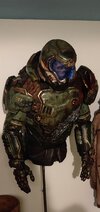
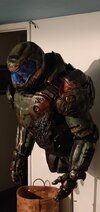
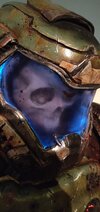
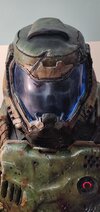
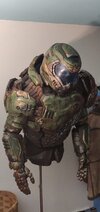
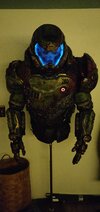
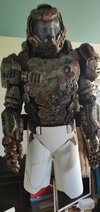
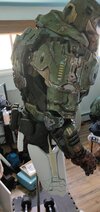
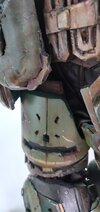
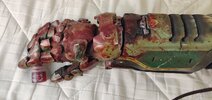
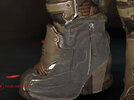
Doom 2016 Praetor suit

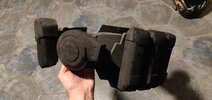
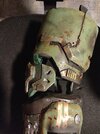
Whoops, just realized I didn't show the elbows-
IMG_20210708_015116.jpgIMG_20210708_015126.jpg

I ended up just needing to add a small semi-elastic strap on one edge, attached to all three segments, in addition to the two in front and back. I put it on the outwards facing side, since the pads tended to move inwards. Helped keep the forearm in place too. It's a small detail, but it gave me a lot of trouble so I figure it may help someone at some point. I didn't expect it to work so well, but I'm glad it did.
 
I'm so glad I found your thread! Your armor is awesome, and I'm getting a lot of ideas for my own build that I'm starting. I'm hoping to get mine done by October, fingers crossed. I love what you did with the EL wire in the helmet! I'm printing out a helmet right now, I'm going to see if I can do something similar with a neopixel strip I have laying around. It has a weather proof sleeve on it, and I think I can cut a strip of it to fit the edge of the visor, and scuff it up to make a decent flexible light diffuser. EL wire would look nicer, but this is probably gonna get expensive, might as well save money by using lights I have :lol:

I really like the way your gloves turned out. Do you have a link to the gloves you used as a base?
Thanks, I'm glad the thread is a help to you! The EL wire looks great in moderate to low light, but it does disappear in the sun. The LEDs would definitely be a more versatile solution if you can get them to work; honestly I just threw in the EL wire because it was sitting around unused as well.

These are the gloves I used, no complaints so far
 
I'm so glad I found your thread! Your armor is awesome, and I'm getting a lot of ideas for my own build that I'm starting. I'm hoping to get mine done by October, fingers crossed. I love what you did with the EL wire in the helmet! I'm printing out a helmet right now, I'm going to see if I can do something similar with a neopixel strip I have laying around. It has a weather proof sleeve on it, and I think I can cut a strip of it to fit the edge of the visor, and scuff it up to make a decent flexible light diffuser. EL wire would look nicer, but this is probably gonna get expensive, might as well save money by using lights I have :lol:

I really like the way your gloves turned out. Do you have a link to the gloves you used as a base?
If you are interested in the gloves and still have not printed them I just created this Remix of it where I improved all parts and scaled them to the correct size. I am currently making my own DOOM Slayer cosplay and wasn't that happy with the original files.

I printed them in the correct color, but I might paint some details on them later:
IMG_20210730_193005.jpg
IMG_20210730_192956.jpg


Maybe my remix will help you too, as I invested some time to improve them ;)
 
Last edited:
Argent
So first of all I only registered to this forum to appreciate your doom slayer cosplay it is truly amazing. I wish that someday my attempt will look like yours. I basically have the same idea like ike in his thread, unfortunately he didn't continued the thread. But I was happy to see that you still update yours at regular basis. So keep up the great work (y).

I already have the helmet from the doom eternal collectors edition and just like Ike I wanted to use a 3D printer for some of the parts and for the Rest I will use EVA Foam.

I actually never did a cosplay before and never worked with EVA Foam, but I need a new hobby.
The fact that you did the armor without any template impressed me, because it looks really accurate. How do you achieve it?

What do you think of my Idea to just buy a cheap "military west" like this one for about $20:
West.jpg


And then just add / glue some foam and 3D printing parts to it.
Because I want it to be comfortable and with the west I would have a base on which I can start working.

Do you think this could work or should I try to simply do it all with EVA Foam just like you did?
 
Argent
So first of all I only registered to this forum to appreciate your doom slayer cosplay it is truly amazing. I wish that someday my attempt will look like yours. I basically have the same idea like ike in his thread, unfortunately he didn't continued the thread. But I was happy to see that you still update yours at regular basis. So keep up the great work (y).

I already have the helmet from the doom eternal collectors edition and just like Ike I wanted to use a 3D printer for some of the parts and for the Rest I will use EVA Foam.

I actually never did a cosplay before and never worked with EVA Foam, but I need a new hobby.
The fact that you did the armor without any template impressed me, because it looks really accurate. How do you achieve it?

What do you think of my Idea to just buy a cheap "military west" like this one for about $20:
View attachment 308460

And then just add / glue some foam and 3D printing parts to it.
Because I want it to be comfortable and with the west I would have a base on which I can start working.

Do you think this could work or should I try to simply do it all with EVA Foam just like you did?
Thanks!

I did mine completely from scratch because I feel like it gives me the most control over how the end product will turn out. I spent a lot of time cutting and re-glueing foam to get the shape just right, and if I started with an existing structure I don't think I would have had quite as much flexibility. On the flip side, building off of a plate carrier like that would have been a lot easier and massively less time consuming.

The key is to make sure everything sits off of your body enough, for instance the chestpiece sits 3-4 inches further out than my actual sternum. If you just glue the plastic right to the carrier you'll end up with a skinny Doomguy. The layering and beefing-up is where the EVA foam comes in handy, if you're good at 3D printing then for sure print up whatever bits you can to throw on top.

Take pictures to compare to the in-game model as you work too, because you never know how something will look until it's actually on your body. I played it a little too fast and loose, so a lot of time was spent trying to fix mistakes that I could've avoided if I just stopped and looked at the thing once in a while. Ideally, routinely take pictures, set them side by side with the game version, then shim an armor plate or put a new layer of foam on a section to get the right shape. As long as the silhouette looks right, the suit will look good. With an ODST or Marine armor that has pretty standard proportions it's easier, but you have to get creative with something like the Praetor suit.


Good luck, and whatever you do don't make yours better than mine. Very important for my ego.
 
If you are interested in the gloves and still have not printed them

Oh that's awesome! Thanks for posting your remix! Unfortunately I already have 95% of the right glove printed, and have everything scaled and mirrored already in a project file for the left glove. Just need to get my stoopid resin printer to cooperate with me again lol. So messy, plus I'm a resin printing newb, so it's been a pain.

I'll check out your remix though, I certainly have enough resin to reprint everything if I just happen to stumble onto how to get perfect prints.

Edit: Also you got me thinking about molle straps to attach the armor rather than velcro or magnets, so double thanks!
Thanks to hear that. I basically only did some changes to the thumb parts and finger tips, so if you want, you can reprint these and use them with rest you already have it should match if you also scaled them at 120%.

Resin printers are fancy and the output quality is perfect, but I would never want to work with them :D

I never thought of using molle straps either ^^' but this really seems like a good idea. Especially because I ordered that west now, so I have to thank you too ;)

I just discovered your thread, it look really looks good so far. I might start my own thread but my printed broke and I am waiting on spare parts from china.

Good luck, and whatever you do don't make yours better than mine. Very important for my ego.
Don't worry, yours is quite hard to beat. Your paint finish is really on point with all the details and blood.
I will make a clean build and I might not even paint my 3D parts as I print them in the correct color.
That raises another question: What color did you use for painting your EVA foam? Did you mixed it yourself? Was it some spray paint or something else? I know that you used an air brush for some details, but for the rest?
 
Thanks to hear that. I basically only did some changes to the thumb parts and finger tips, so if you want, you can reprint these and use them with rest you already have it should match if you also scaled them at 120%.

Resin printers are fancy and the output quality is perfect, but I would never want to work with them :D

I never thought of using molle straps either ^^' but this really seems like a good idea. Especially because I ordered that west now, so I have to thank you too ;)

I just discovered your thread, it look really looks good so far. I might start my own thread but my printed broke and I am waiting on spare parts from china.


Don't worry, yours is quite hard to beat. Your paint finish is really on point with all the details and blood.
I will make a clean build and I might not even paint my 3D parts as I print them in the correct color.
That raises another question: What color did you use for painting your EVA foam? Did you mixed it yourself? Was it some spray paint or something else? I know that you used an air brush for some details, but for the rest?
I went with Rust-oleum moss green spray paint, which really didn't match right at all. I think there are pictures earlier in the thread of that color. I tried doing a thin layer of burnt sienna oil paint over top, and I liked the look of the two combined so I've done the whole thing like that. With oil paints, you can dab it on and smear it around with a paper towel to your liking. That's where most of the faux rusty look came from, along with the general color. The airbrushing came in handy for any vents or scorch marks, and I went over the edges of the battle damage to make it all pop out a bit more. I tried to go over the seams and joints as well, to accentuate them, but more often than not I goofed and had to wipe it off. The airbrush is definitely fun, but I don't think it's vital to a project like this. Maybe if I get some practice in I could do more with it.

I did a bunch of different acrylic washes in blacks and browns as well, generally the more you do the better it will look. The little details were done with paint sharpies. I think I linked the gunmetal and blood acrylics earlier, both are great options, but they will chip right off of plastic.

EVA foam has to be sealed before painting, any Plasti Dip spray can will do the trick. For the leather bits, I used some brown spray paint and went in with the black and brown acrylics to break up the solid color. If you don't want to do a fancy finish, then you can slather it in watered down acrylics and blot off most of it with a towel to make it look a bit more realistic without too much effort. There are plenty of good weathering ideas on the internet; my strategy is usually just to keep throwing more paint onto it until I like the look.
 
Last edited:
College snuck up on me, and now I'm away from home for the immediate future. I think I can call the suit "finished" from the waist up, though, and the legs shouldn't be too hard to knock out during breaks. Who knows, maybe with Covid I'll be back home soon anyway...

Here are some pictures on the armor stand I rigged up:
IMG_20210819_021334.jpgIMG_20210819_021416.jpgIMG_20210819_021451.jpgIMG_20210819_021317.jpgIMG_20210819_021514.jpgIMG_20210819_022437.jpgIMG_20210819_022518.jpgIMG_20210819_022537.jpgIMG_20210819_022609.jpgIMG_20210819_022343.jpgIMG_20210819_021549.jpgIMG_20210819_021632.jpg

These pictures are in a few different lighting conditions, and some with the armor lights on and some without. The true color is probably closest to the first 9, my phone camera doesn't like too much or little light like in the last few. Just for fun I ordered a polyurethane skull cast to sit the helmet on top of, and while it's definitely a little dumb I think it looks cool.

Changes to the suit include: superficial battle damage with a silver paint sharpie, darker tint on visor, reworked chest light, left shoulder reseating and right shoulder rounded out a bit, WIP waist section, plus probably more that I forgot.

The stand is a mannequin torso, with PVC pipe arms and the aforementioned skull cast plopped on top and persuaded into place with a bit of cutting and squishing. Both seem to be out of stock currently, but the links redirect to the Etsy store so I assume they'll pop back up at some point. I should mention that the mannequin has no angular flexibility, so as you may be able to tell in some of the pics I had to just whale on it with a drilling hammer and put a good 15 degree bend in the steel pipe stand to get the correct looking posture.

I'll update when I can, although it's not like I've been particularly regular anyway. Deuces
 
Ok, did a bunch more stuff on the weekends. Mostly more symmetry fixes to the helmet and torso, at this point I think I can live with whatever wonk is still there. The other stuff:

-Tons of work on padding and a better suspension system. I did a bunch inside the helmet and on the back section, plus an elastic strap on the wrist guards to keep them from flapping around. I cleaned up the wrist joint a bit and added some foam layers, just to beef it up and keep it looking more unified.
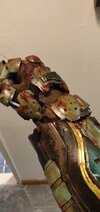
IMG_20211031_012944.jpg

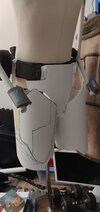
-Got a belt thing going, still have to do the front section but at this point it's a good stand in. The whole thing is kept up by a clip in the back that attaches directly to the cuirass. The front seems to stay up fine on its own, and with only one attachment point the two pieces can still move pretty freely. I will see how the legs will have to get rigged up. I anticipate them to be pretty heavy, so I don't know if I can get away with hanging them off of the belt, but I also don't want to do a separate Urkel-style suspender system if I can avoid it.
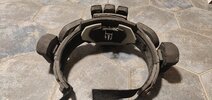
IMG_20211031_012728.jpg
IMG_20211031_012655.jpg
Screenshot_20211031-014550.jpg

-And a bunch of little details that I wanted to get out of the way, like bits that needed to be touched up and stuff I fudged the first time through.


The suit looks a lot better on me than the mannequin, which makes sense because the thing is a Frankensteined hack job. Here are some test videos, complete with my atrocious suit acting ability. I tried to throw a combo, because it feels like something you should do in a Doomguy suit, but halfway through I remembered that I have zero arm mobility. I can only assume that the Praetor Suit had some fancy no-clip space magic in the shoulder joints. First vid is a mobility test, second one is to look at the lighting. Ignore the clacking, that is definitely what an indestructible suit of space armor is supposed to sound like.


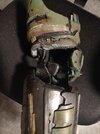
I'm really happy with how it's going so far. The elbows and wrists really gave me a lot of trouble, so it's great to see those look all neat and well-aligned. That stuff is really easy to take for granted when looking at a good replica costume, but in practice everything moves around and it's an absolute nightmare to keep it all from going haywire. Next up is going probably going to be the rest of the belt, then probably a leg mock up. I have some more red EL wire that I bought because it's just so dang cool, so I have to figure out where that will go. Maybe in the back somewhere.

I think I have the visor as dark as it will get, it's already pretty hard to see out of so I don't want to make it worse. If I was smart I would have just done a dyed vacu-formed visor, but when I put the helmet together I didn't think I'd ever be as deep into this as I am currently. I would have to pay someone or build my own vacuum rig, which is a lot more work than I want to get into right now. Maybe at some point I will just rebuild the helmet, but there's lots to do before I worry about that. Aside from that, I can't think of any loose ends I want to tie up. Mostly just need to keep building stuff, which is easier said than done now, but the finish line is starting to come over the horizon.

Thanks for reading, peace out. Might post again soon if I can get some good stuff done over the rest of the weekend.
 
Wow! Just... Wow!

I'm getting ready to do my visor at the moment, and I'm struggling with the vacuum forming problem too. I would really REALLY like to pay someone to do it for me, but I have not found anyone offering those services for a one off, yet. If I decide to build a vacuum table myself, I have to get everything, including the shop vac, and I would not really have any use for it outside this one visor. Well... I really should get a shop vac if I'm being honest with myself lol.

I got some scrap polycarb laying around, and now is as good a time as any for me to print out the visor buck that came with my helmet file. I'm going to try to smooth it out with bondo, then see if it will be possible to use a heat gun and a lot of patience to form a visor. I'll let you know what my results are. I've gotta make a post in my thread anyway. I've been working on the suit, just slowly lol.

If you decide you want to rebuild the helmet, I got the new printer running, and it can print the helmet in one piece. I'll definitely hook up a fellow Slayer ;)
Ooh thanks, that is extremely tempting... if the heat gun works out I would definitely commission you for a raw helmet and buck. I have pretty vague visibility with mine, plus the whole thing is beat to hell after messing with it for a year. At this point it would probably make a better display piece than wearable prop.

This is the video that I watched on vacu-forming PETG visors, the end result looks perfect for a doom helmet. I do have a shop-vac and a heat gun, but since I'm away now I'd have to wait until December to start a new project. I have to imagine someone on here would do vacu-forming on commission, and the dying part wouldn't be much of a pain. Would want to get a few made though because I can imagine messing it up the first try. The heat gun would definitely be a far more convenient solution if it works out.
 
Started a very wip set of legs and butt+cod plates. I am going to have to mock up the entire lower leg and foot before I can tell whether these are entirely within proportion. I have to imagine they're at least somewhat out of whack, but I made everything bigger than it needs to be so I can just cut it down when I need to. Once I can see that everything is correct-ish, I'll start gluing on padding to get the right shape, then do the detailing. Not a very exciting update as of right now.
IMG_20211031_233146.jpgIMG_20211101_142530.jpgIMG_20211101_142539.jpg


I picked up some white low-density EVA foam from Michaels. It seems to be pretty good quality, and it's a lot lighter than the other stuff so I might get away with hanging the legs off of the belt. I still need to figure out the pants and shoes I'm going to use. I haven't looked too hard at the boots on the Praetor Suit, but I think I'll probably have to figure out a custom sole. It would help add some height as well; I think I'm actually as tall as Doomguy is in 2016 and Quake, but overcompensating wouldn't hurt. Plus, as with all space marine costumes Doomguy has some disproportionately long legs, so jacking up the boot depth would help fake that.

The crotch area is going to be a pain. I want to make everything look as cohesive as possible, but blending joints is hard in an area as complex as the hip. I anticipate a lot of elastic strapping, and maybe some leather if I get ambitious. I did this little bit of dressing up on the inner shoulders, to make the edge look a bit less drastic. At the waist, I won't have the luxury of a big shoulder pad covering everything up, so I'll have to figure out a more high fashion solution. The knees shouldn't be bad, I figure I might even incorporate an elbow joint just to keep everything 100% in line with itself.
IMG_20211101_144648.jpg


And, of course I had to finish off the pot of blood paint I had lying around.
IMG_20211031_233900.jpg

That's all for now, winter break is coming up fast so mayyybee I'll have this thing together by Christmas. Apparently, nothing reinvigorates my creative drive more than living in a place where I can't actually work on anything.

Peace
 
This thread is more than 3 months old.

Your message may be considered spam for the following reasons:

  1. This thread hasn't been active in some time. A new post in this thread might not contribute constructively to this discussion after so long.
If you wish to reply despite these issues, check the box below before replying.
Be aware that malicious compliance may result in more severe penalties.
Back
Top