Help & Suggestions for 1st Build Plz

Status
Not open for further replies.

he4thbar

Sr Member
Member DIN
S434
This was on my Build thread but I feel like with how many questions I ask on there.. It would be more fitting to make a thread dedicated to questions I have during the build process.
Right now I scaled my body & armor in Armorsmith Design (6'2" 170ishLBs)
Armor will be mainly 3/8th" foam, 1/2" Foam for the chest plate and an extra 1/4th" smaller sheet for smaller detail armor.
The only one I think i'll have to buy more foam(thinner) for would maybe be the abdominal/lower back soft armor. (maybe use 1/4th for that)

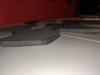
Regarding my images do you all think this armor looks to scale for my body or are there any suggestions for certain pieces you would give me?
Also how much room do you typically give yourself between armor and body?
front.PNG back.PNG left side.PNG right side.PNG bottom.PNG top.PNG

I am posting here because I still have a lot of questions during the process and want to make sure my end result is something similar to what I hope for. I'm sure I will have more questions in the future. Thanks.
 
This looks awesome!
Since points to consider:

1) your forearms, unless you intend to hinge them, need to be bigger so you can slide your hands in and out. Even if you have skinny hands, those forearm pieces are gonna be hard to get on and off without tearing. Also, on your model, they're upside down.

2) you don't want a litt of space between you and armor because it will impede your movement further than it already does, cause uneven wear on your body, and you risk snagging it on things. You want to be able to breathe and circulate blood, obviously, so don't overdo it, but keep it tight.

3) do your helmet last. You'll develop a ton of skill and technique with just your first few pieces, and after doing that the helmet will turn out better, which is good since that's where a lot of attention goes.

That sums ut up for the moment. Good luck!
 
I made all of my suits out of 1/2" foam, while scaling I compensated for it. If it was a little to big I used 1" furniture foam to help fill the gaps and also help it stay snug to my body. For your helmet if you get a cast I recommend getting ach padding(it padding for military helmets) I used mine from when I was in the service and it works nice
 
This looks awesome!
Since points to consider:

1) your forearms, unless you intend to hinge them, need to be bigger so you can slide your hands in and out. Even if you have skinny hands, those forearm pieces are gonna be hard to get on and off without tearing. Also, on your model, they're upside down.

2) you don't want a litt of space between you and armor because it will impede your movement further than it already does, cause uneven wear on your body, and you risk snagging it on things. You want to be able to breathe and circulate blood, obviously, so don't overdo it, but keep it tight.

3) do your helmet last. You'll develop a ton of skill and technique with just your first few pieces, and after doing that the helmet will turn out better, which is good since that's where a lot of attention goes.

That sums ut up for the moment. Good luck!
Thanks! The helmet i'm actually already working on out of PEP and i'm taking my time with that one. As for the rest I appreciate the advice, I'll have to do some more modifying to slim out some parts. I didn't know about the forearms needing more space and definitely didn't realize they were upside down... oops. Thanks for all the advice i'll have to do some more tweaking.
I made all of my suits out of 1/2" foam, while scaling I compensated for it. If it was a little to big I used 1" furniture foam to help fill the gaps and also help it stay snug to my body. For your helmet if you get a cast I recommend getting ach padding(it padding for military helmets) I used mine from when I was in the service and it works nice
I never even thought about furniture foam, thats a good idea thank you! also yeah I read a little bit on the forums about padding even airsoft padding would help. It's a pep helmet so i'll definitly need it. thanks!
 
I'm sure you plan in using fiberglass to stiffen the outside, not sure how well the velcro will hold to it tbh
 
yep, fiberglass resined the outside, clothed the inside. just gotta add another layer(cloth) and then rondo it.(then bondo)
This may sound stupid (probably because it is) if there's gonna be cloth on the inside try and sew the padding to the cloth and then tac that down with some glue or something
 
This may sound stupid (probably because it is) if there's gonna be cloth on the inside try and sew the padding to the cloth and then tac that down with some glue or something
Sorry that may have been my bad explaining. Fiberglass cloth. So I coat the "cloth" in fiber glass and put it in the helmet. and fiberglass resin is some sticky ass stuff to work with. and drys and sticks to the paper rock solid(reinforces the hell out of it). no worries there. mostly the foam armor is where i'm gonna go in with more questions.
 
Sorry that may have been my bad explaining. Fiberglass cloth. So I coat the "cloth" in fiber glass and put it in the helmet. and fiberglass resin is some sticky ass stuff to work with. and drys and sticks to the paper rock solid(reinforces the hell out of it). no worries there. mostly the foam armor is where i'm gonna go in with more questions.
Or I may have just read it wrong but I gotcha now then you should be able to put velcro strips in and call it a love story
 
One suggestion I would make would be to adjust the scale of your shins. They may be scaled to game accuracy but, games don't don't account for human anatomy. It will be very difficult to walk with the way they are now. The top of the calf will ride up into the back of your thigh and the bottoms will limit the bend of your ankle/feet. You'll end up walking stiff legged and don't even think about climbing up or going down stairs.
I ring this up from personal experience.
20180610_001155.jpg

I didn't wan to rebuild my shins so I made alterations instead. I cut scallops out the back of the calf and widened the opening of the bottom to allow me to walk normally.
 
Started cutting foam today...
can I get your guys opinions on these cuts? I'm doing it with a heavy L ruler (see pic). And outlining the template cutouts with a pen.
im using an fiskars hobby knife with the cutting but I have a husky box cutter knife that might be better suited..
if you guys have any advice or tips let me know, I can't help but feel the foam is getting cut at a slight angle even though I'm using the straight edge. Might be because I'm using the hobby knife.

or am I over thinking it and they are ok cuts
IMG_20190625_222649.jpgIMG_20190625_222429.jpgIMG_20190625_222439.jpgIMG_20190625_222408.jpgIMG_20190625_223648.jpg
 

Attachments

  • IMG_20190625_222414.jpg
    IMG_20190625_222414.jpg
    2.5 MB · Views: 268
Last edited:
They look great! If your worried about the cuts not being slightly beveled, I reccomend not sitting when you cut, and make passes in one long cut. This will make it nice and smooth, and hopefully perfect. You can also take a dremel, set it to the highest speed you have, and remove it fast in the direction it is spinning. Kamuicosplay just made a video on YouTube about this if you dont know what I'm saying, and it helps
 
Your cuts look good. Keep a *☆☆☆SHARP☆☆☆* blade. But you're looking ok. Those cuts look like mine. Just be REAL careful with your seams, and this will come out flawless.
Thanks, that's encouraging to hear from you. And yeah I have a blade sharpener I try to use every cut.

You can also take a dremel, set it to the highest speed you have, and remove it fast in the direction it is spinning. Kamuicosplay just made a video on YouTube about this if you dont know what I'm saying, and it helps
Thanks for that advice! I have a rotor tool sitting around so i'll just have to bust that out and do some cleaning up, i'll check out that video too just to be safe.
 
They look great! If your worried about the cuts not being slightly beveled, I reccomend not sitting when you cut, and make passes in one long cut. This will make it nice and smooth, and hopefully perfect. You can also take a dremel, set it to the highest speed you have, and remove it fast in the direction it is spinning. Kamuicosplay just made a video on YouTube about this if you dont know what I'm saying, and it helps
Why avoid sitting?

Also, this build is looking fantastic, keep it up!
 
Why avoid sitting?

Also, this build is looking fantastic, keep it up!
I think avoid sitting so that you can cut above the foam directly and not create an angle/bevel because you will cut at a direct 90 degrees. I'm cutting foam from giant 4'x6' Foam sheets so I really have no choice but to cut on the floor at this point anyway haha.
 
I think avoid sitting so that you can cut above the foam directly and not create an angle/bevel because you will cut at a direct 90 degrees. I'm cutting foam from giant 4'x6' Foam sheets so I really have no choice but to cut on the floor at this point anyway haha.
Hmm, I'm probably fine then, because I sit in a desk chair and cut on a tiny side table about as tall as my knees. At least when I'm detailing that is, I make big cuts with a boxcutter on my (previously nice) table, and that sits at a regular height.
 
I think avoid sitting so that you can cut above the foam directly and not create an angle/bevel because you will cut at a direct 90 degrees. I'm cutting foam from giant 4'x6' Foam sheets so I really have no choice but to cut on the floor at this point anyway haha.
Here's a tip. If you find it annoying by working with large mats. after tracing out your parts cut out small sections so you won't have that 4x6 mat to be constantly turning and and walking around.
 
Here's a tip. If you find it annoying by working with large mats. after tracing out your parts cut out small sections so you won't have that 4x6 mat to be constantly turning and and walking around.
I've found this helpful myself, but I only do it when I know I won't need a long cut from that mat later.
 
Here's a tip. If you find it annoying by working with large mats. after tracing out your parts cut out small sections so you won't have that 4x6 mat to be constantly turning and and walking around.
The next level strats right here.

I rip my traced out sections down to individual parts with a seam allowance for trimming. It's a bit more wasteful on foam but it lets you have more than enough surface to place your steel ruler on or to cut appropriate bevels.

Having individual parts lets you better manipulate them on the table and keep track of all your pieces for prep and assembly. You might have seen my pattern stacking knolling technique on Bucket to Boots, it may look like chaos but it helps for speed building.
272555
 
Status
Not open for further replies.
Back
Top