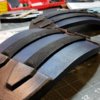
ODST Foam build - Stepping up from DFT (Finished Build Pic on Pg. #11)

Status
Not open for further replies.
That skull suits it perfectly! Are you gonna have her do more emblems for the rest of it, like UNSC logos and other assorted symbols n' stuff?

Definitely! Only problem is: I knew nothing of the HALO series until I started building the DFT sets for my kids. Even then, it was "just armor". Since then, I have been watching the YouTube cut scene movies and reading up as much as I could. Never been a big fan of FPS games either. Who knew there was sooooo much lore to the HALO franchise. Its mind-boggling! Spartans, Cortana, The Convenant, Brutes, Elites, Diadacts, Forerunners, New Mombasa, Reach, the flood, and on and on and on.........

So when I read the forums about Reach armor vs. that armor, etc., I am lost and have to go google it. I do have quite a bit of admiration for all of you who can spout this and that off without even thinking and then turn around and actually build it!

So the problem for further stencils is: I don't know what UNSC ones should be standard or if anything else needs to be added. Having them made is not an issue, but I would wholeheartedly welcome any replies with what would be good to have made as related to the ODST set.
 
Oh the lore is amazing alright!!! You can go for days reading about it lol

For referencing I say use Reach's ODSTs as they have better texture quality which means clearer references and it has more details overall, even though your set is from Halo 3: ODST which has a bit of a difference in some areas, such as the leg sections and some chest sections.

I'm going to be putting Reach ODST detailing onto my set when I start revamping/remaking sections of my trooper, which is the same style as yours.
 
Last edited:
So the scaling on the pepped helmet seems to be just right. I have just enough room to fit my head through the bottom without any issue. Inside the bucket there is enough room for me to add padding, fans, LEDs, etc. Exterior has been coated with resin to stiffen up the cardstock.
20181115_185333.jpg 20181115_185434.jpg

The best news though!? A local artist that I am good friends with volunteered to help me with the ODST helmet! Self taught and driven, here are a few pics of what he is capable of.
FB_IMG_1542378220985.jpg FB_IMG_1542378263232.jpg FB_IMG_1542378133876.jpg FB_IMG_1542378338714.jpg

His talents are beyond belief! Looking forward to seeing what skills I can learn from him.
 
Side plates are 100% complete. I cut and trimmed a thin sheet of aluminum to reinforce them. The idea is to attach them to the chest armor with velcro and hide the seam line. The metal will, in theory, prevent the side plates from bending when taking them off.
IMG_20181124_205658_613.jpg 20181124_205105.jpg 20181124_205127.jpg 20181124_205137.jpg 20181124_205109.jpg

Also started the exterior bondo process on the ODST helmet.
20181124_210155.jpg
 
I didn't really care for the whole foam shoulder base so I decided I wanted to make something other than foam. For all of you that can sew.............my hats off to you! Having never touched a sewing machine before, I got a crash course via You Tube and a few practice runs before testing out my idea.

Far from perfect, but I like the design. By sewing the loop side of the velcro in the middle, I will be able to position the shoulder pieces as needed for mobility. Being as this was merely a prototype, it will be tossed and a new one will be made using lessons learned. Oh, and SHARP scissors. They help out a lot when cutting 600D Cordura fabric!

20181207_200748.jpg 20181207_200915.jpg 20181207_200942.jpg

Update on the rest of the pieces: Adding in some filler pieces to the chest on the sides of the center chest plate. Apparently I am a little bit bigger than I had anticipated.....LOL. Forearms are in the sealing stages and should be ready for paint in a few days. I set the helmet aside for now being as I want to focus on finishing the build. I just need to stop coming up with ideas and changing them mid way through!

20181207_203637.jpg 20181207_203708.jpg
 
That looks so good! Wow! It looks super comfy too, and I'm guessing it is a super snug fit without any shifting?!

On the test mock up, it does seem to be comfortable and because it is foam, it is ridiculously light. I'll still need to make up a spacer though as attaching the shoulder piece directly to the base puts it butting up or overlapping into the chest piece. I intend to follow the same path for the thigh armor as well. Sew a patch of "loop" side velcro to the pants and then the "hooks" onto the interior of the thigh pieces. Really trying to avoid any visible straps on this build. A lot of it is trial and error.

Test mock up of the spine protector base, spine protector, and butt plate. I integrated 1.5" nylon webbing into a make shift belt. Have to step away a bit from accuracy to pull off functionality here. The ultimate goal is to utilize the "belt" as a base for the hip plates, butt plate, and ODST belt buckle. Once everything is attached it should "hide" most of the rig.
20181209_210407.jpg 20181209_211136.jpg 20181209_213026.jpg 20181209_213052.jpg
 
Quite a productive weekend!

Made the straps for the butt & hip plates to integrate into the spine protector belt. FINISHED the spine protector and shroud. Mated them together using E6000 fabric glue (thanks 405th threads!)
20181216_074820.jpg 20181216_074826.jpg 20181216_163857.jpg 20181216_163905.jpg 20181216_164501.jpg20181216_100321.jpg 20181216_102701.jpg 20181216_164823.jpg 20181216_164827.jpg

Freehand made templates for the spacers for the shoulder pieces. Got it on the second attempt. Got them glued on with contact cement and because of the velcro, they can be adjust up / forward / rear on the shoulder without impacting the chest. Also printed, cut out, and put a medical badge (Again, thanks 405th!) on the left shoulder piece. Couple coats of Mod Podge and done!
20181216_163125.jpg 20181216_163239.jpg 20181216_163255.jpg 20181216_163410.jpg 20181216_163451.jpg 20181216_163415.jpg

Lots of sewing and gluing, but I am getting ever closer to finishing the full set (Sans the helmet for now)!!!
 
Con question for all you veterans out there: What is the amount of wear and tear on your armor after attending a con? I mean, basic wear and tear without any exaggerated movements, dancing, running, etc. Just normal walking around, posing for pics, etc.

As I finish each piece, I look at it and ask myself "what can I do to reinforce the foam to prevent excessive wear on it. I try to foresee wear / rub points and design a work around into the piece to mitigate it, but having never actually worn a full suit of foam armor, I am kind of shooting from the hip here.

An example of my over thinking here is on the ODST boot covers. I traced out, drilled holes, and contact cemented thin sheet metal into the interior sides of the toe cap and plan to add 1.5" nylon webbing with a rubber floor matting as the bottom layer (I have miles of this stuff at my job). The idea is to create a slip on over my shoe w/ elastic holding it at the heel while still offering some protection against wear and tear while walking.
20181218_193914.jpg 20181218_214704.jpg 20181219_085856.jpg 20181219_085900.jpg 20181219_085913.jpg

I've done the same thing with the side plates, belt buckle, and plan to add some to the interior of the chest armor once the boots are done.

Am I over thinking this? Any experience all you veterans have would be much appreciated!
 
Those toe caps are now literally combat ready!

I'm also far from a veteran but figured I'd toss my two cents in. I had a few areas rub and wear some paint away which wasn't so bad at my last con.

I also blew a glue joint on a thigh piece which was my own fault as I didn't take them off before sitting for a while... but it's an easy fix.
 
I also blew a glue joint on a thigh piece which was my own fault as I didn't take them off before sitting for a while... but it's an easy fix.

Thanks for the insight. When I built the inside portions of the thigh pieces, I didn't attach the rearward parts. Instead, I attached 1" elastic to the bottom most piece and used 3/4" nylon webbing to act as a make shift guide. The idea was that the elastic and webbing would keep the inner "ribs" close to the piece and against my inner thigh but flex a bit when sitting. Again, over-thinking on my end as I am sure it would be fine without it.
 
Status
Not open for further replies.
Back
Top