Status
Not open for further replies.
Quick recap for today:

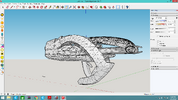
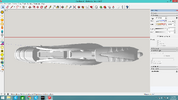
Got bored and wanted to see how much of a bad idea printing a full scale fuel rod gun would be.
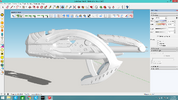
I actually remembered that the .OBJ files made available through the awesome members on the forums tend to play nice when imported into meshmixer, and then imported again to sketchup.
Screenshot (63).png
The game rips are low poly and I have been learning my lesson about printing them like this and then trying to sand everything smooth. Not fun.
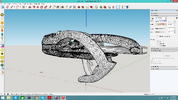
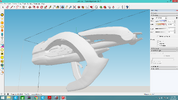
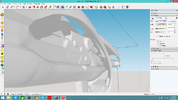
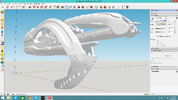
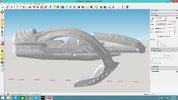
Screenshot (64).pngScreenshot (65).pngScreenshot (66).png
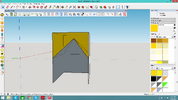
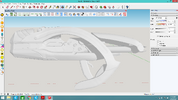
Look at all those extra polygons! Taking some time to clean things up internally before moving into carving out details and cutting this 52" monster up for printing. Also had an idea while grabbing lunch, like most of my ideas its either incredibly cleaver or stupid.
Rather than printing each part in typical fashion (multi walled shell with infill) what would happen if the parts were printed in hollow rings and then filled with an expanding foam? I'd imagine that everything could be skewered together with dowels and glue. No clue how much this would save on material and time but I'd reckon it'd be quite light and sturdy if done with enough support. I'll value any insight anyone offers! Remember that I still have no idea what I'm doing most of the time!

Edit: I almost forgot this!

The barrel reciprocates in the games when you ready/stow and fire it. How cool would it be to pull this thing off your back, hit a button and send the barrel flying out?!
 
Last edited:
Angus314 Did you print hollow and fill with expanding foam?

As long as your shell is thick enough (I'd say at least three walls) for stability, I think it'd work - though you'd want to compare densities for different expanding foams before hand, to make sure you find one that is strong enough to withstand impacts to a degree. Though, I can't imagine you'd be losing a whole lot of material or time from infill, if you're only printing it at say 5-10%
 
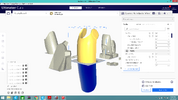
Here's what the barrel shroud would be at 100% scale. Notice how only half of it fits in the 25X25x30cm build volume....
Screenshot (68).png
Only 223 grams with no infill, not that this is a part that would be "easier" if it were hollow. Were it to have 5% infill the material cost increases by almost 100 grams ( up to 312g) and takes 12 hours longer. Being one of the thinner parts there's about a 30% increase in PLA with infill. The Body might use over 60-80% or more for something with more volume.

Math Edit:

Assuming you print a cube of water that is 5cmX5cmX5cm with walls .12cm (3 layers) thick, making each wall 3cm cubed, at total internal volume of something shy of 125cm cubed, 5% infill would occupy 6.25cubic cm (125cm cubed X.05). The cube would weigh, again just under, 18grams (3g per wall and there's 6 walls, ignoring the fact that the walls would overlap a bit) The infill weighing 6.25g is about 34% the total mass of the cube. This is the last time I say cube I swear, Assuming the fuel rod gun is a cube, and PLA has a density of 1g/cubic (see what I did there?) cm, I'd be saving 34ish% on printing medium with this method.
and assuming I did basic math right......

Fun fact, I have no idea how dense PLA is :D
 
Last edited:
Mmm details
Screenshot (69).png

1648143678658.png
Using this bad boy as reference.
Its great working with the actual game model, even though I'm just free handing the details in its super easy getting things to line up with the textures in the reference photo. I'm also having a lot of fun with this too!
 
Angus314 Did you print hollow and fill with expanding foam?

As long as your shell is thick enough (I'd say at least three walls) for stability, I think it'd work - though you'd want to compare densities for different expanding foams before hand, to make sure you find one that is strong enough to withstand impacts to a degree. Though, I can't imagine you'd be losing a whole lot of material or time from infill, if you're only printing it at say 5-10%
Be careful printing with 0 infill as it can remove support for top layers if there’s large flat top areas. I printed my forearms and biceps with 0 infill and a generous amount of bottom and top layers. They’re super solid because I used about 6 walls to print them. No expanding foam needed when they’re that solid. Just keep in mind they do get hefty and it can use a good amount of material.
 
Be careful printing with 0 infill as it can remove support for top layers if there’s large flat top areas. I printed my forearms and biceps with 0 infill and a generous amount of bottom and top layers. They’re super solid because I used about 6 walls to print them. No expanding foam needed when they’re that solid. Just keep in mind they do get hefty and it can use a good amount of material.
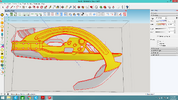
That was my biggest worry. The more I work with this model the more feasible printing it seems. A lot of the sections are narrow or slowly taper into a point that might not need to be supported in any fashion. I'm now considering editing the inside of parts so they would self support or limit the infill to just the top. I'll draw this idea up once I'm back at my desk.
If this actually pans out the only parts that would need infill would be the front and back of the body. Everything else could get sliced so it's just an empty ring with no top or bottom.
 
Screenshot (70).png
Super happy with this so far. The sketchup extension that lets you subdivide includes a selector to increase/decrease the sharpness and profile of vertices after they get split up. This is how I'm getting everything to be smooth while letting some areas pop and hold a better edge.
Screenshot (71).png
Keeping everything close to the reference isn't too bad, currently the only creative liberties I've taken is carving the lines on the rear a little deeper and increasing the size of some of the cut outs so they show up better. Aiming to get the rest of the body and hand guard detailed up and then I'll try and tackle the front end.
 
Last edited:
And here's the minimal infill idea I had summed up.

Screenshot (72).png

The print would start out like its in vase mode, just printing the outer/inner walls. At a point near the top the inner walls would taper together at an angle the printer can manage. The area in orange would generate infill (technically its inside the part and not just a cavity) allowing a flat surface to print successfully while saving on time and material! I'll definitely give this a practical test but I cant see why it wouldn't work.
 
Small suit update!

My friends and I are starting a new DnD campaign and we are forcing each other to wear costumes for the first session. Can you guess who the tank is this time?

Me, it's me...


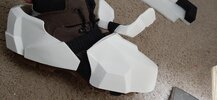
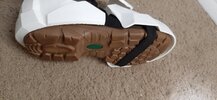
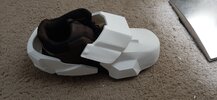
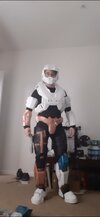
Seeing as this will be the first semi practical test of the armor I started getting some strapping in place for the boots and biceps. The shins will be the only other parts that will need to be secured somehow. I'm just kinda winging it to far, gorilla glue and some elastic, but eventually I'd like to reinforce these strap points and armor with fiberglass and resin.
20220326_181929.jpg
20220326_181939.jpg
20220326_181954.jpg
The boots just slip over my steel toes with minimal strapping underneath. Still gotta focus on walking on my heels so I don't lose footing or slip. I wonder if I could coat the strap in flex seal or something grippy so I don't need to worry about that.
 
Screenshot (74).png
Almost done, just gonna detail the barrel, handle and ammo. Definitely want to see about getting something in place to make the barrel extend. I was thinking about making the trigger the release for it, getting a latch right there should be straight forward. The whole thing would likely ride on bearings or rollers so its stable.
My poor little decade old laptop can hardly deal with all the new polygons it has to generate each time I go from the base model to the subdivided one. I don't think I will be able to export this very easily due to this... If I understand what's in front of me, the game rip has around 10k edges and polygons total, at least 3400 just being unique faces. Each time I subdivide sketchup makes 4 new polygons per face. I sub the model twice.... that's over 54k polygons on this thing! Very surprised my computer hasn't caught fire yet.

And just look at how cute some of these details are!
Screenshot (75).png
 
Last edited:
Screenshot (76).pngScreenshot (77).pngScreenshot (78).pngScreenshot (79).png
That's about it for the main sections! A few things got left out, the model honestly is starting to feel a little cluttered with all that was added.
This might be wishful thinking but if I could run the printer non stop, this might only take a week and a half-two weeks if the parts are printed hollow. And I really, REALLY want to print this. Once everything is done I'll post the STLs incase someone is crazier than myself and wants to be a guinea pig.
 
First private outing of the suit was a success! Found a few things that need tweaking and confirmed a few concerns about the practicality of wearing it.

First, it's too hot. My friends house was set to 76F and I was sweating as soon as the helmet went on. Need to get something in place not only to cool the helmet but the torso as well. I'm talking like water proof pockets to store ice packs coupled with fans. Fans everywhere. I don't have much confidence in Floridian air conditioning when it comes to large convention centers.

Second, I need to figure out how to better secure the knee pads and how to stop the biceps from rotating around my arm. These are things I knew would need to be addressed and my short notice solutions only partially worked.

Third, movement isn't really an issue! Sure I lack a little bit of range but walking/ backing up/ side stepping was a breeze! Didn't even need to think about how my feet landed when taking a step. Everything felt natural, bulky but natural.

Forth, got a "this is so *expletive* cool" a few times as one of my friends helped clip the torso together. A few others who are familiar with Halo mentioned how good they thought I scaled everything. This is such a relief for me, I lost far too much sleep worrying about proportions and really needed that.

And finally, I really gotta finish this thing.

Screenshot_20220403-180702_Gallery.jpgfullbody.png
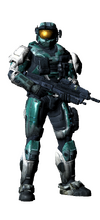
I'm so close to getting my boy off Reach and boots down out in the wild with y'all. I hope I can find the time to at least paint it soon. I am happy with the color I did on the knee pads. It's pretty darn close to the game teal with proper lighting. Not as much green but I can always compare colors as I see them.

Next update should be about finalizing the shoulder pads and a mounting system.

Happy crafting til then!
 
First private outing of the suit was a success! Found a few things that need tweaking and confirmed a few concerns about the practicality of wearing it.

First, it's too hot. My friends house was set to 76F and I was sweating as soon as the helmet went on. Need to get something in place not only to cool the helmet but the torso as well. I'm talking like water proof pockets to store ice packs coupled with fans. Fans everywhere. I don't have much confidence in Floridian air conditioning when it comes to large convention centers.

Second, I need to figure out how to better secure the knee pads and how to stop the biceps from rotating around my arm. These are things I knew would need to be addressed and my short notice solutions only partially worked.

Third, movement isn't really an issue! Sure I lack a little bit of range but walking/ backing up/ side stepping was a breeze! Didn't even need to think about how my feet landed when taking a step. Everything felt natural, bulky but natural.

Forth, got a "this is so *expletive* cool" a few times as one of my friends helped clip the torso together. A few others who are familiar with Halo mentioned how good they thought I scaled everything. This is such a relief for me, I lost far too much sleep worrying about proportions and really needed that.

And finally, I really gotta finish this thing.

View attachment 316334View attachment 316335
I'm so close to getting my boy off Reach and boots down out in the wild with y'all. I hope I can find the time to at least paint it soon. I am happy with the color I did on the knee pads. It's pretty darn close to the game teal with proper lighting. Not as much green but I can always compare colors as I see them.

Next update should be about finalizing the shoulder pads and a mounting system.

Happy crafting til then!
Looks great!! I attached my knees with thin foam and glued them to the shins to make one piece. But I also like how Electraknite did theirs too. I had the same issue for the biceps. Adding two straps for my back/ chest helped and adding thin foam inside.
 
I have snaps on my undersuit that hold my biceps from rotating, tho i havnt actually worn my suit in the wild yet so wether it works remains to be seen. My knees are probably my favourite construction hahaha, they feel so legit like actual kneepads.
 
Looks great!! I attached my knees with thin foam and glued them to the shins to make one piece. But I also like how Electraknite did theirs too. I had the same issue for the biceps. Adding two straps for my back/ chest helped and adding thin foam inside.
Thanks! I found that when the knees are duct taped to the lower legs I can still manage to slip the whole thing on. I'm likely going to swap the tape for elastic/nylon straps. Hopefully this will give a tad more wiggle room when it comes to putting them on.
 
Last edited:
I have snaps on my undersuit that hold my biceps from rotating, tho i havnt actually worn my suit in the wild yet so wether it works remains to be seen. My knees are probably my favourite construction hahaha, they feel so legit like actual kneepads.
I wish I could bend far enough to warrant cushioning the knees to support my weight. I'll maybe try some sort of extension to the torso seal at the arms to add a clip or button for the biceps like you mentioned. Thanks for the input!
 
Last edited:
That is looking great. How much mobility do you have with the feet?
I can still point/roll my feet and can bend my legs up to about 90° so basic movements are a non issue. Bending more then this causes the armor to come into contact with other parts and stops any more movement. The thighs are just pulled over knee braces which stop them from falling off and allow them to move and rotate with me. No strapping on the lower legs either, they grab on to the bottom of the brace and the shoes stop them from falling. Everything moves with me so I just need to adapt to being a bit bulky rather than fighting the armor to move.
 
Status
Not open for further replies.
Back
Top