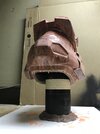
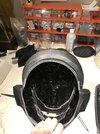
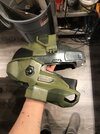
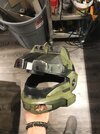
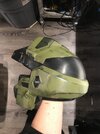
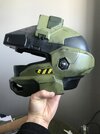
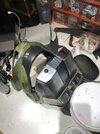
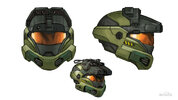
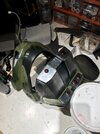
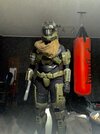
Reach Jun Build (Foam/fibreglass + custom undersuit)

Status
Not open for further replies.
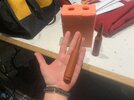
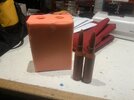
finally going to make some progress this weekend. Got my casting supplies, for anyone curious my total cost was just under 700$ Cad.

List:
2 gal Rebound 25 silicone
Thi-vex thickener
2 gal smooth cast onyx fast
Mold release
Monster clay
Brushes, stir sticks
Mixing cups

I’ll be starting the casting this weekend, I can’t afford to mess this up so any tips would be welcome.
I’ve watched every video from tested, punished props and smooth-on about casting helmets so I’m optimistic.

D59C2A49-E9AA-476A-B1F2-86E3283915B3.jpeg
 
If you're working with silicone, make sure to use latex-free gloves! I wouldn't have know that unless someone else told me. It stops the silicone from curing. Make sure what you're molding is clean, and try to keep your tools as clean as possible too (I'm really cautious when it comes to molding with silicone who knows what might stop it from curing).

Make sure to stir the silicone/resin extremely well. You've got plenty of time with the silicone to mix it. And make sure to apply both the silicone and resin in layers (I see you have vi-vex which is good). If you mix too much resin up at once, it might pool inside the helmet.

I assume you're going to slush cast the helmet, have you got anything for a jacket mold?

Apart from that, good luck!
 
finally going to make some progress this weekend. Got my casting supplies, for anyone curious my total cost was just under 700$ Cad.

List:
2 gal Rebound 25 silicone
Thi-vex thickener
2 gal smooth cast onyx fast
Mold release
Monster clay
Brushes, stir sticks
Mixing cups

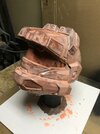
I’ll be starting the casting this weekend, I can’t afford to mess this up so any tips would be welcome.
I’ve watched every video from tested, punished props and smooth-on about casting helmets so I’m optimistic.

View attachment 314308
Cost seems about right for this. The good thing is you’ll have a bunch of left over silicone if you wanted to mold other parts to your armor.
 
If you're working with silicone, make sure to use latex-free gloves! I wouldn't have know that unless someone else told me. It stops the silicone from curing. Make sure what you're molding is clean, and try to keep your tools as clean as possible too (I'm really cautious when it comes to molding with silicone who knows what might stop it from curing).

Make sure to stir the silicone/resin extremely well. You've got plenty of time with the silicone to mix it. And make sure to apply both the silicone and resin in layers (I see you have vi-vex which is good). If you mix too much resin up at once, it might pool inside the helmet.

I assume you're going to slush cast the helmet, have you got anything for a jacket mold?

Apart from that, good luck!
I have nitrile gloves and I’m thinking I’ll use what I have left of my polyester resin to make a fibreglass jacket. I’ll spray mold release before applying the jacket.


Cost seems about right for this. The good thing is you’ll have a bunch of left over silicone if you wanted to mold other parts to your armor.
Prob won’t cast my armor but I’ve got some other things planned for it, Bullets and other little things. Hand plates maybe. Magnum? Who knows.
 
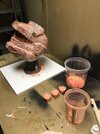
1st layer is on, I mixed too much so I’ll use the extra for keys. I mixed 300ml and only needed probably 150ml for the first stipple layer.

Yesterday I tested the silicone against all my stuff to make sure it’d cure. All seemed good so tonight I’ll have the glove mold done and curing. Mmmmmmboy it’s going easier than expected. I forgot to get dye though so it might get more difficult as the layers disappear into each other.

0250D1F6-47D6-4F60-8002-2EF11F801E64.jpeg709F72DF-F79A-4D4F-AB9D-B4AE6BBAA39A.jpeg32BD4E5B-E29B-43FE-AC55-142C7432CCAE.jpeg
 
Mold is finished, it looks pretty good. There’s a couple bubbles I noticed but for my first Mold ever I’m happy. I also made a bullet Mold for practice and because I actually need one anyway.
Par for the course it took me twice the time I thought it would. Hahaha oh well.

E6648553-EA76-45DF-B3CD-5CBAF84F0433.jpeg2547CF8D-084D-40D8-A2E9-68C88519250F.jpeg1C77C600-C8C9-4B3A-B3EB-71C584BC09F3.jpeg9C177810-FC9D-4B75-9A39-1A439A17ED5A.jpeg
 
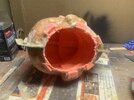
This is the second casting, first one i made was too heavy. This casting is still a bit heavier than the 3d print… which i was hoping would not be the case but here we are.. ill improve as i make more. I think i used around 34 oz, if i can do like 24ish oz i think itd be a better weight. Though i do like the thickness of it as it..
Anyone have info on how heavy an average helmet casting is?


87713233-CB48-4A6A-9A01-802E14C639D3.jpeg8E40D1CE-21B1-4F96-A891-424FCD32B4D4.jpeg6EDA6924-87BC-42CD-B833-8151B7A0CAE4.jpeg

If i was to do this again, id try to find some 57D, just going by video, it seems more flexible than onyx. Though i dont know if theres a weight difference between the 2.

i like it, my mold looks good. No mold imperfections show on the castings so im counting that as a major W.
 
I think you could probably get away with a thinner cast. I haven't done helmets with onyx, but I've done other work with it before and it's pretty strong stuff.

57D is defanetly a little softer and I've had some interesting experiences with it deforming a little when it gets too hot, so I would probably stick with the onyx.

Edit:

Also in my expierince, if you want a strong cast, it'll typically be as heavy as the print you made the mold from, but it will be significantly stronger than the print.
 
Everything looks awesome, But i do have a question. I'm unfamiliar with casting and have never done it, but what makes the inside of the helmet shiny as opposed to the matte finish that is seen on the outside of the helm?
 
Everything looks awesome, But i do have a question. I'm unfamiliar with casting and have never done it, but what makes the inside of the helmet shiny as opposed to the matte finish that is seen on the outside of the helm?
The resin itself is super shiny, the outside isnt because the silicone captures the texture of the master helmet. So because i didnt polish the master perfectly smooth it replicates the texture from it.. if that makes sense.
Technically you could polish it to a shiny finish But because im going to paint it anyway i wanted a texture that the paint will stick better to.
 
I finished the paint job. I’ve gotta get some varnish before I muddy it up still though
9A77B5A9-3A03-462B-8256-A9A3947BA595.jpeg04FF7642-AC9D-44CB-91CF-A422767A6A00.jpegBBDF3E56-87EF-476A-B801-3766D60BDD88.jpegADC1325C-E400-4FB7-9AC7-C74B69A6FB7F.jpeg281719F4-1B7B-4652-9774-327FD2C74E8D.jpeg98CE2B2D-0BC7-4258-9B7D-B3D7B3816791.jpeg

I also made the back plate flexible with vinyl and yoga mat foam. It magnets on. I’ll glue it to the helmet in the center so it doesn’t shift or fall off as well.
 

Attachments

  • AE8F3BD1-9C6F-448A-BD9A-B58729717BF8.jpeg
    AE8F3BD1-9C6F-448A-BD9A-B58729717BF8.jpeg
    1.1 MB · Views: 206
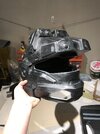
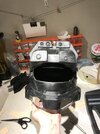
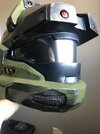
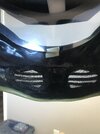
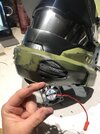
Small update, I’ve finished the helmet vent, excluding the fans. I’ll have to figure out how to attach them, they are 5v 3D printer fans they fit almost perfectly in the vent space but I have to make a good attachment point to mount them. Even without the fans it’s easy to breath.

I used styrene and foam for the lines and stretchy mesh to hide my face. The fans will also block the view inside.
The visor is just a COVID visor cut to fit and window tinted. I’ve got some bronze window tint on the way and I’ll add some extra details to it.

6A35647C-C0E0-4A09-A406-C69B2613D404.jpeg7FABB944-76D5-430E-A27E-F0FA3BA225EC.jpeg4BA27A68-838F-4C43-BCCE-ADC258F3CEB9.jpeg

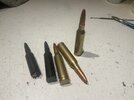
Next up I think is the bicep sniper attachment. I’ve been putting the attachments off mostly because I forget they existed ahaaa. Ive finished the bullets so far. theyre cast in onyx with a foam core. I think I’ll attempt foam for this one mainly because i need it lightweight as possible. The biceps already like to fall to my elbows I need to figure out some better attachment for them I think.
F3C145DC-8185-468D-BC12-0778E8321740.jpeg

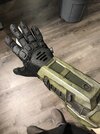
And I ordered these gloves from Amazon, tell me they aren’t perfect. I frickin love em. here’s the Amazon link if anyone is interested

E70E7555-8BED-495D-A83D-06767FD18E07.jpeg
 
Last edited:
I did a suit test and I’ve come to some conclusions but I want to hear what you guys think.
Which photo looks more accurate for sizing?
1 is unaltered and 2 is

BD7E72B3-41CF-4451-90C1-2BB2FAF1D1BA.jpeg00F4E408-6F97-4327-9721-7E68D3B96A96.jpeg

I personally think my cod is too small, looks too feminine. And the lower part of the chest is too small as well.
These would not be difficult things to adjust and I think I’d be more confident with the changes but I still wanna hear your honest opinions.
 
Last edited:
I mean... It's been said. I think the second pic looks a little more game accurate but your work is so damn good that I don't think you should sacrifice all comfort for that minor of a change. The ab piece I could go either way on with the cowl you cant really see it anyway. But the thighs being a little higher looks better. The cod, I wouldn't worry about too much bc both look fine. Idk which is more accurate but I think comfort is important and something like that shouldn't take away from your tier. Your work is crazy high quality and we all have to make some adjustments so that we can actually wear the armor for any significant period of time, so pick whichever is more comfy I say.

Also your build is inspirational. I'm always excited when I see updates on this thread!
 
FalseShepherd oh it’s not gonna change the comfort level at all. Mostly it’s when I look at pics of mine side by side with a game model I can tell the cod and and stomach plate are small. It’s not a big deal but it bugs me a little every time I wear it. If I was building a female Spartan it’d be fine but I want it to look as close to male proportions as I can get it.
Also yes the thighs will sit higher, as soon as I can make em stop falling down. I’m considering Velcro to the belt or undersuit.
Also I’m glad you’re enjoying my trials and tribulations hahaha
 
Status
Not open for further replies.
Back
Top