First Ever Build - Another Mark V(B) (In Progress)

Med

New Member
Hey everyone! I'm excited to finally have enough going on to warrant making my first post!

Just for fun at the end of last year, I started up the ol' nerf MA40 repaint project (in the MA37 Reach style) and was originally only going to put it on a shelf or hang it on a wall in the game room. Well, I ended up getting 90% of the way through with it before I got busy and sidelined it. About a month ago I got a burst of creativity and finished it, and was pretty happy with the result.

(Before, obviously)
20220824_124135.jpg

(And after, duh)
MA40.jpg


The only thing that bugged me was the oversized magazine sticking out, and I was a little too nervous to try and chop apart the only magazine I have for this thing. This drove me to jump into the all-consuming void that is the world of 3d printing and got my own. After a couple of weeks of calibrating and learning everything, I printed this flush-fitting bad boy that still needs to get sanded and painted.

20230306_004146.jpg


After this was the point that I decided to take this from wall decoration to cosplay prop.

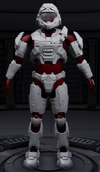
I was initially going to go the ODST path but ended up deciding to go for the Reach Mark V(B) that we're all here for. I chose to go with the files from SkookumProps (thank you for the quality helmet, good sir). From here I bought Armorsmith and tossed the helmet in with MoeSizzlac's (another thank you for another awesome dude) Reach armor files just to make sure the proportions on everything weren't going to be too goofy.

Armor Scale.png

These aren't the armor files that I plan on printing, it was just here for now for reference and scale.
If anything on there doesn't look quite right though, please let me know :)

After eyeballing it in Armorsmith and then going through two sets of test scaling rings, I decided to go for it.
20230305_223620.jpg


Over a week later of my new baby printer running day in and day out, we finally have it. (the Firewarriors in the back say hello)
All 8 pieces were finally printed, glued, and bonded.
Once the weather warms up a bit more I'll start sanding, bondo-ing, sanding, priming, more sanding, and maybe, just maybe... painting.

I'm also printing out the UA and Brim attachments (and maybe the HUL, haven't decided yet) and my goal is to get it looking something like the old Noble Six from the Deliver Hope live-action trailer
x720.jpg


This was a huge learning experience for me and my new printing abilities and I'm pretty anxious about everything that lies ahead, but it feels really nice to have this thing all put together now.

Huge shoutout to DeltaAlphaZulu for his awesome youtube guide that he uploaded just in time to help me to slap everything together. And a big thanks to everyone in the discord for answering all my questions and making me feel welcome.

I hope to keep everyone updated soon and hope that you will all hold me to seeing this through to the end :)
 
Hey everyone! I'm excited to finally have enough going on to warrant making my first post!

Just for fun at the end of last year, I started up the ol' nerf MA40 repaint project (in the MA37 Reach style) and was originally only going to put it on a shelf or hang it on a wall in the game room. Well, I ended up getting 90% of the way through with it before I got busy and sidelined it. About a month ago I got a burst of creativity and finished it, and was pretty happy with the result.

(Before, obviously)
View attachment 328772
(And after, duh)
View attachment 328766

The only thing that bugged me was the oversized magazine sticking out, and I was a little too nervous to try and chop apart the only magazine I have for this thing. This drove me to jump into the all-consuming void that is the world of 3d printing and got my own. After a couple of weeks of calibrating and learning everything, I printed this flush-fitting bad boy that still needs to get sanded and painted.

View attachment 328768

After this was the point that I decided to take this from wall decoration to cosplay prop.

I was initially going to go the ODST path but ended up deciding to go for the Reach Mark V(B) that we're all here for. I chose to go with the files from SkookumProps (thank you for the quality helmet, good sir). From here I bought Armorsmith and tossed the helmet in with MoeSizzlac's (another thank you for another awesome dude) Reach armor files just to make sure the proportions on everything weren't going to be too goofy.

View attachment 328769
These aren't the armor files that I plan on printing, it was just here for now for reference and scale.
If anything on there doesn't look quite right though, please let me know :)

After eyeballing it in Armorsmith and then going through two sets of test scaling rings, I decided to go for it.
View attachment 328770

Over a week later of my new baby printer running day in and day out, we finally have it. (the Firewarriors in the back say hello)
All 8 pieces were finally printed, glued, and bonded.
Once the weather warms up a bit more I'll start sanding, bondo-ing, sanding, priming, more sanding, and maybe, just maybe... painting.

I'm also printing out the UA and Brim attachments (and maybe the HUL, haven't decided yet) and my goal is to get it looking something like the old Noble Six from the Deliver Hope live-action trailer
View attachment 328771

This was a huge learning experience for me and my new printing abilities and I'm pretty anxious about everything that lies ahead, but it feels really nice to have this thing all put together now.

Huge shoutout to DeltaAlphaZulu for his awesome youtube guide that he uploaded just in time to help me to slap everything together. And a big thanks to everyone in the discord for answering all my questions and making me feel welcome.

I hope to keep everyone updated soon and hope that you will all hold me to seeing this through to the end :)
The Ar came out beautifully! Hyped to see how the suit turns out!
 
Hey everyone! I'm excited to finally have enough going on to warrant making my first post!

Just for fun at the end of last year, I started up the ol' nerf MA40 repaint project (in the MA37 Reach style) and was originally only going to put it on a shelf or hang it on a wall in the game room. Well, I ended up getting 90% of the way through with it before I got busy and sidelined it. About a month ago I got a burst of creativity and finished it, and was pretty happy with the result.

(Before, obviously)
View attachment 328772
(And after, duh)
View attachment 328766

The only thing that bugged me was the oversized magazine sticking out, and I was a little too nervous to try and chop apart the only magazine I have for this thing. This drove me to jump into the all-consuming void that is the world of 3d printing and got my own. After a couple of weeks of calibrating and learning everything, I printed this flush-fitting bad boy that still needs to get sanded and painted.

View attachment 328768

After this was the point that I decided to take this from wall decoration to cosplay prop.

I was initially going to go the ODST path but ended up deciding to go for the Reach Mark V(B) that we're all here for. I chose to go with the files from SkookumProps (thank you for the quality helmet, good sir). From here I bought Armorsmith and tossed the helmet in with MoeSizzlac's (another thank you for another awesome dude) Reach armor files just to make sure the proportions on everything weren't going to be too goofy.

View attachment 328769
These aren't the armor files that I plan on printing, it was just here for now for reference and scale.
If anything on there doesn't look quite right though, please let me know :)

After eyeballing it in Armorsmith and then going through two sets of test scaling rings, I decided to go for it.
View attachment 328770

Over a week later of my new baby printer running day in and day out, we finally have it. (the Firewarriors in the back say hello)
All 8 pieces were finally printed, glued, and bonded.
Once the weather warms up a bit more I'll start sanding, bondo-ing, sanding, priming, more sanding, and maybe, just maybe... painting.

I'm also printing out the UA and Brim attachments (and maybe the HUL, haven't decided yet) and my goal is to get it looking something like the old Noble Six from the Deliver Hope live-action trailer
View attachment 328771

This was a huge learning experience for me and my new printing abilities and I'm pretty anxious about everything that lies ahead, but it feels really nice to have this thing all put together now.

Huge shoutout to DeltaAlphaZulu for his awesome youtube guide that he uploaded just in time to help me to slap everything together. And a big thanks to everyone in the discord for answering all my questions and making me feel welcome.

I hope to keep everyone updated soon and hope that you will all hold me to seeing this through to the end :)
I'm ecstatic that my tutorial was able to help you out with your build! Let me know if there's anything else you'd like help with and I'll get some videos made!

Also, if you haven't heard it yet, Welcome to the 405th!

Your build so far looks great! I can't wait to see your armor finished!

If you have any questions let me know and I'll help you in any way I can!
 
Not too much progress this week but figured I'd post just to keep the ball rolling.

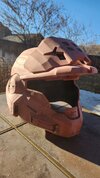
I've got the UA and brim pieces printed off and welded together now. Still need to sand and apply putty.
20230315_224542.jpg

Also have the first layer of spot putty slapped on the helmet after sanding down the epoxy. Even after just that little bit, I don't look forward to all the sanding that lies ahead...
20230315_224608.jpg


It was my first time messing with the putty so it looks a little rough, but it's all going to get sanded down so oh well. It also kept ripping through the gloves that I was using as it started to dry so I'll have to invest in some sturdier ones.

There are tons of detail lines and sharp angles on here that I'm trying really hard to keep intact. I didn't want to cover absolutely everything at once and then forget where some of the finer details were once everything becomes the same shade of Bondo, so I might sand down what I have here and then move on to the more hard-to-reach areas with the next go around.

Planning on keeping the UA and brim off until all the base colors are sprayed on just so I can spray them separately and save myself some future time with masking. A lot of work ahead of me, but I'm still pretty excited.
20230315_224807.jpg

I've also ordered a visor sheet from IconProps that should be here within a week or so, and have been looking into files for the rest of the armor. Leaning towards going with NerdForgeDesigns' base set, though I still need to find a good way to cut it up to fit my printer.
 
Not too much progress this week but figured I'd post just to keep the ball rolling.

I've got the UA and brim pieces printed off and welded together now. Still need to sand and apply putty.
View attachment 329081
Also have the first layer of spot putty slapped on the helmet after sanding down the epoxy. Even after just that little bit, I don't look forward to all the sanding that lies ahead...
View attachment 329082

It was my first time messing with the putty so it looks a little rough, but it's all going to get sanded down so oh well. It also kept ripping through the gloves that I was using as it started to dry so I'll have to invest in some sturdier ones.

There are tons of detail lines and sharp angles on here that I'm trying really hard to keep intact. I didn't want to cover absolutely everything at once and then forget where some of the finer details were once everything becomes the same shade of Bondo, so I might sand down what I have here and then move on to the more hard-to-reach areas with the next go around.

Planning on keeping the UA and brim off until all the base colors are sprayed on just so I can spray them separately and save myself some future time with masking. A lot of work ahead of me, but I'm still pretty excited.
View attachment 329083
I've also ordered a visor sheet from IconProps that should be here within a week or so, and have been looking into files for the rest of the armor. Leaning towards going with NerdForgeDesigns' base set, though I still need to find a good way to cut it up to fit my printer.
Your helmet looks great! There's just something about spot putty red that really ties the whole helmet together! Hobby stores usually sell sanding sticks/needles that help to clean up the fine lines and details from the spot putty.

Aside from that have you picked out a color scheme yet?
 
Your helmet looks great! There's just something about spot putty red that really ties the whole helmet together! Hobby stores usually sell sanding sticks/needles that help to clean up the fine lines and details from the spot putty.

Aside from that have you picked out a color scheme yet?
As of now, I'm thinking just the default Noble Six grey/black. I sometimes think it might be a bit too plain though and might go for something that pops a little more.

A colored base, like RandomRanger's red, is a good contrast that really makes the black bits stand out and look really nice, but I'm not sure.
 
Sheeeesh, has it really been that long since the last update?

Honestly not too much has happened over the past few weeks. Been busy with classes and we had an extended winter up here so I only really got outside to do some sanding about once a week. I'd then reapply some bondo to some touch-up areas and have to wait until another tolerable day to do it all again. Here's, for some reason, the only picture I decided to take through all of that.

20230322_182350.jpg
I eventually got around to spraying it all with filler primer and with today being noticeably warmer, I decided to knock out all the wet sanding.
These smooth boys will be spending some time in the tub while they fully dry.
20230410_161155.jpg

Some areas seem like they didn't get enough primer/got a bit too much sanding, but I'm not too worried about it and honestly think some of it might play into some wear and tear. Now I've got to decide on a color (think I've got a good grey picked out) and finally spray on some base coats.

Aside from that, I bought the MK V armor files from NerdForgeDesigns and scaled 'em up to size.
Scaled.png

We'll see how long it takes me to get around to the rest of the set, but I've got 'em ready for whenever that comes. I'd like to wear a spartan to the upcoming local con, but it'd be a real crunch. My biggest concern is just hoping that the helmet is scaled well and that it won't look too bobble-headed.
 
hello everyone, I'm new to Eva armour making, and this is my first armour, i know there are a lot of mistakes in it but I would like to know on how to fix them without remaking it, like most of it was built with the foam on the wrong side out. but i would like to just get some of the people who have dealt with it before but any ideas on how to deal with it would be appreciated. :)
Hello. So, you have made your first post here in another member's build thread.
This is often viewed as poor etiquette as you are coming into another member's thread and talking about your costume, without any reference to the creator of the thread's builds.

If you could, I would ask that you create your own new thread by going out to the Topic Listing and clicking the orange button labeled "Create Topic" on the top right.
This will allow you to create your own thread for your build, and we can get these extraneous and off topic posts here cleaned up out of Med's thread, so it can stay on topic and keep their thread clean.
 
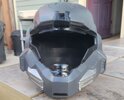
Time for an overdue progress report photo dump!
Been stumbling my way to steady progress. We've finally gotten base colors sprayed onto everything and it's slowly coming to life.
20230426_194800.jpg20230426_195412.jpg20230426_200442.jpg
I decided that I'm gonna hit all the smaller vents and nooks with a brush instead of spraying. Once everything is the color it should roughly be, I'll hit it with some clear coats to knock down some of the sheen and bring it all together a bit more. After that, it's on to detailing and weathering.

Side note, I hate how much of a difference lighting makes in these gray colors. Indoors and in warmer lighting, I love this gray. Once it gets into sunlight though, it's crazy bright and I'm much less of a fan.

Side by side:
20230426_195152.jpg20230426_194800.jpg

I'm trying not to judge it too harshly before I get the black wash and weathering onto it though.

Overall, it's coming along nicely.

20230426_200528.jpg
 
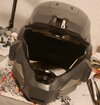
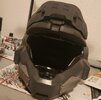
Man, life really slows this stuff down. Finals took up a good month of time and I recently started a new job so things have been sidelined for a bit. Now that I'm more settled into everything, I've gotten around to hand-painting all the smaller areas and crevices with black and finally glued the brim to the bucket. I'm very pleased with how it's turning out.

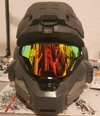
I am also thinking about just having only the brim instead of adding the UA plate. I think it's the perfect amount of grey/black and I feel the UA would add too much black and bulk, but we'll see. Next will be adding some weathering/wash and then attaching the visor (which I still haven't figured out the best way to do yet).
20230612_173110.jpg

Aside from that, I finally finished painting the flush-fitting AR magazine that I printed so that it matches the rest of the gun.
20230612_174145.jpg


Now is also the time I am thinking I should start the rest of the suit. This hopefully means that I'll start being more active both here and the Discord, as I have tons of questions about diving into that.
 
Man, life really slows this stuff down. Finals took up a good month of time and I recently started a new job so things have been sidelined for a bit. Now that I'm more settled into everything, I've gotten around to hand-painting all the smaller areas and crevices with black and finally glued the brim to the bucket. I'm very pleased with how it's turning out.

I am also thinking about just having only the brim instead of adding the UA plate. I think it's the perfect amount of grey/black and I feel the UA would add too much black and bulk, but we'll see. Next will be adding some weathering/wash and then attaching the visor (which I still haven't figured out the best way to do yet).
View attachment 332451
Aside from that, I finally finished painting the flush-fitting AR magazine that I printed so that it matches the rest of the gun.View attachment 332452

Now is also the time I am thinking I should start the rest of the suit. This hopefully means that I'll start being more active both here and the Discord, as I have tons of questions about diving into that.

Those look SO clean! The AR especially, I'd never have expected that was a Nerf gun in a previous life, looks amazing!
 
Love the paint job on the AR!

Yeah... life really slows down the making process doesn't it :(
Glad to see you back!
 
Man, life really slows this stuff down. Finals took up a good month of time and I recently started a new job so things have been sidelined for a bit. Now that I'm more settled into everything, I've gotten around to hand-painting all the smaller areas and crevices with black and finally glued the brim to the bucket. I'm very pleased with how it's turning out.

I am also thinking about just having only the brim instead of adding the UA plate. I think it's the perfect amount of grey/black and I feel the UA would add too much black and bulk, but we'll see. Next will be adding some weathering/wash and then attaching the visor (which I still haven't figured out the best way to do yet).
View attachment 332451
Aside from that, I finally finished painting the flush-fitting AR magazine that I printed so that it matches the rest of the gun.View attachment 332452

Now is also the time I am thinking I should start the rest of the suit. This hopefully means that I'll start being more active both here and the Discord, as I have tons of questions about diving into that.
For attaching the visor, I use steelstick to attach mine. It's a compound putty that you knead together and it hardens like rock. After you tack it in and trim off any excess with that you can carefully secure the rest with small bits of hot glue (being careful not to let it run onto the visible part of the visor).

You're doing great btw. I love the paint job :)
 
Know it's been said multiple times already but seriously, killer job on the painting! Looking forward to the final product!
 
For attaching the visor, I use steelstick to attach mine. It's a compound putty that you knead together and it hardens like rock. After you tack it in and trim off any excess with that you can carefully secure the rest with small bits of hot glue (being careful not to let it run onto the visible part of the visor).

You're doing great btw. I love the paint job :)

Would I have to worry at all about the hot glue warping/messing up the helmet since it's just printed with PLA? Or do you just use such tiny bits that its no worry?

And is it very hard to trim the sheet once it's tacked in place? I feel like I'd struggle to position scissors or a blade to get good cuts.

Sorry to barrage you with questions, I'm really just cluelessly stumbling my way through making this so everything helps
 
This thread is more than 6 months old.

Your message may be considered spam for the following reasons:

  1. This thread hasn't been active in some time. A new post in this thread might not contribute constructively to this discussion after so long.
If you wish to reply despite these issues, check the box below before replying.
Be aware that malicious compliance may result in more severe penalties.
Back
Top