Reach Jun Build (Foam/fibreglass + custom undersuit)

Status
Not open for further replies.
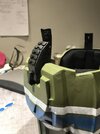
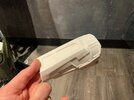
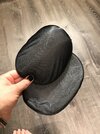
Hmm been away longer then I was expecting. I’ve finished the bicep. I’m going to add shoulder pads to the undersuit just so my arms dont look too skinny. im using curved ones but I’m going to put them in upside down so they look like muscles instead of broad shoulders.
A3011135-B541-49BC-A14B-A68154728795.jpeg997E0858-40E2-47B9-A5B0-4816953F7BC3.jpeg

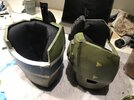
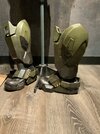
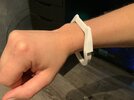
I also made padding for the biceps so they don’t wobble. it’s 1" seat foam covered with spandex. I used super 77 to glue it all. Was a lot easier to make the padding then I was expecting. They fit so nice now.
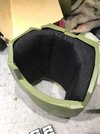
DFB0564B-2E96-4A43-A85F-E2EF08CCC00F.jpeg017E78A5-B821-46BD-8513-D9ACD374AD9D.jpeg

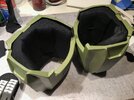
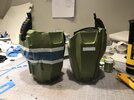
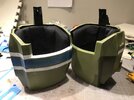
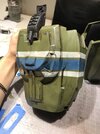
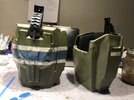
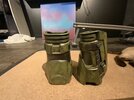
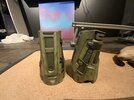
paint job is done, weathering and all was done the same way I did the others.
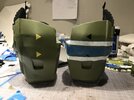
0BD54B13-2E9E-4B50-9D07-41F734A8B531.jpeg3382AC89-64A5-49D9-9658-E191FCE0A910.jpeg8A72AA83-4EE7-4FB4-B1B4-713C1F3D5B98.jpeg00C0302F-5F80-4635-8C37-0CC56E33DD08.jpeg864F7CE6-C657-4FCB-89C6-A3899630E683.jpeg363DCA07-AE0A-499A-8D57-F8FE77956FF1.jpeg8F8DB662-7426-4354-88F6-4518B4AAD78B.jpeg
the part that sticks up I’ll be using to attach with the undersuit to keep the biceps where they should be. They don’t move a whole lot so 1 snap should be enough.

i Still need to figure out the shoes and the forearms are in a sad state of half fibreglassed really grossly. Not sure I’ll use them. my cuz is hopefully going to print the helmet for me.
1.5 months til the con. AAAAAHHHHHHHHHHHOMGGGGG
 
The stress in has begun. Less than a month to the con and i almost forgot I still need to do strapping. Ahhhh
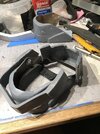
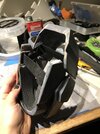
the shoes are almost done. theyve been killing me for like 2 weeks or more. Idk what is time

0AD00115-A1E1-4394-93C4-96B3A58FFBD2.jpegA4E434E3-BDA4-4CC3-9472-468432241F2B.jpeg

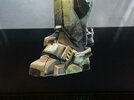
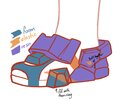
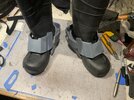
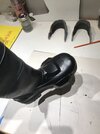
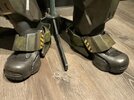
So while staring at this damn boot I noticed the toe is flexible and the heel is hard so that’s how I decided to make mine. My boot isn’t exactly the right shape but it’s a good enough shape that I doubt it’ll be noticeable under the armor. The game boot looks like you could fit 2" of lifts inside it though if anyone is vertically challenged But anyways..
2119D608-D7F6-4E74-84D3-42B9EDE5E1AD.jpeg07152698-C571-406C-86C4-3B6440D7BBF0.jpegB7CDC668-2FF4-4379-9CC8-9A20C5DFDBA2.jpeg3FBD7A0B-77DB-4618-AB10-0BDD2DC6154C.jpeg
boot:
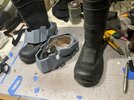
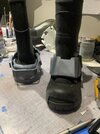
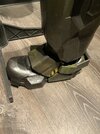
walmart rubber boots are my base. I made a 2mm foam toe cap detail and the top and side detail is 10mm foam carved and shaped so it fits the boot contours. I’m really hoping all of it stays attached while I’m walking all day.
my contact cement was garbage so I used super 77 spray glue to glue it all down. I masked the places I wanted to glue stuff so I didn’t get much overspray but in the end i also plasti-dipped the whole thing so there was no stickyness left.

50BAFE5B-3283-42E0-9FE2-6E56AD36D5F9.jpeg02861A5F-2796-4CC9-81BC-78C1875183BD.jpegC6DD9E2C-5D72-41DE-B78C-F63BAA7DE8BB.jpegA6600DDB-11A0-40B5-AAE0-9EC26B162F61.jpeg
Armor:
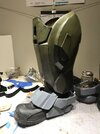
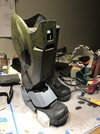
so it’s a bit hard to see and explain but there’s an elastic loop that holds the heel and the top armor parts together that wraps around the top and sole of the boot. the handle parts on the heel are bolted onto the heel. The whole thing just stretches over the boot and stays pretty snug. I added a bunch of foam to the back of the heel so it doesn’t flop while I walk.
I’ve still got some minor detailing to add with 2mm foam.
and next post will be the painting.
unfortunately I won’t have a helmet before the con so I guess I’m just roleplaying Lone Wolf mission for this one.


Oh ya, does anyone know a good varnish for cosplays? id like to not have to worry about the paint if it rains..
 
Last edited:
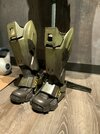
Shoes are done, helmet is hardened and the forearms are printing. I changed my mind about the helmet getting printed and wanted to try it with the forearms instead because the ones I pepped and hardened were awful and Didn’t fit me the way I wanted them to. So having them be printed gives me time to work on the helmet. Yay I might actually have it all done by sept 10.

painted boots
44FC2D84-EFD2-4A41-8CAF-E27E251804F1.jpeg5B90CD10-023D-495E-8871-3543CACA4999.jpegDE08B4EE-7D7A-41B5-B3EF-AAA87E95A827.jpeg321A8369-929C-4871-BFC3-DB7D00F2FB46.jpeg
I’m a bit worried the foam will detach from the rubber boot during the con but I’ll just have to Figure about a better glue after.

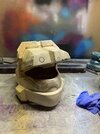
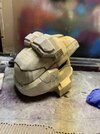
helmet is hardened
3E9899D9-71DA-499A-B79B-48B1815FAF36.jpeg45DB46CB-F86E-4C63-8B6F-9121C3D01829.jpeg
needs sanding and extra detailing. I’m a little worried that might take longer then I think. probably just with 2mm foam to keep the whole thing cohesive with the rest of the suit.

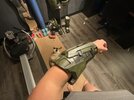
mini printed forearm.
5A6B7095-AC19-48E8-B689-0A42F5D0701A.jpeg
im borrowing my friends printer this week and learning all the things. This was a test to see the orientation and detail and stuff. Also for fun. Couldn’t get the supports out of the inside of it so I’m going to adjust the angle for the final. this is 110mm tall but the final I’m going to print it at 200mm. i also did test pieced of about a cm cut of just the wrist 220mm tall this morning to make sure my hand could fit through the wrist. it was a bit big
2752C71C-A7BA-4664-9532-90756BE5FFBF.jpeg
 
hey 3d printing people, I have a question.
for context, I tried to print a forearm at 0.2mm layer height (it failed 28hrs in and 50% done) i realized that was not going to fit my timeframe of have something wearable by the con so i turned it down to 0.4mm and i cut it in half. the first peice is printed and is what is expected. the layers are clearly visible which doesnt actually bug me. i dont mind filling and sanding.
there is 10 days til the con.

can i just give them a coat of paint so they dont look completely out of place with the rest of the suit and fill them properly later with bondo?(or something you'd recommend that is better) or do you think that paint would cause the fillers to not adhere properly later?
the other thing i could do is leave them unpainted and do as much sanding as I can fit into the timeframe. they are printed with black filament.

just kinda curious what you guys would do in my situation.
Paint won't hide print lines very well (based off of using acrylic on a test print) but at a distance it would be hard to tell. Bondo going on after paint also might not adhere well either. If you were to paint first, spray on sandable filler primer might allow bondo to stick better if you go back at a later date.

How many walls are you using for the arm and how thick are they? Whats the infill like as well?
I over did my forearms but they only took 16-18 hours each I think.
 
hey 3d printing people, I have a question.
for context, I tried to print a forearm at 0.2mm layer height (it failed 28hrs in and 50% done) i realized that was not going to fit my timeframe of have something wearable by the con so i turned it down to 0.4mm and i cut it in half. the first peice is printed and is what is expected. the layers are clearly visible which doesnt actually bug me. i dont mind filling and sanding.
there is 10 days til the con.

can i just give them a coat of paint so they dont look completely out of place with the rest of the suit and fill them properly later with bondo?(or something you'd recommend that is better) or do you think that paint would cause the fillers to not adhere properly later?
the other thing i could do is leave them unpainted and do as much sanding as I can fit into the timeframe. they are printed with black filament.

just kinda curious what you guys would do in my situation.
The usual guide is don't exceed 80% of your nozzle width for your layer height so 0.32mm is the maximum recommended layer. At 0.4 you're basically just stacking layers and not properly pressing and fusing.
 
S225 infill was 20%, walls 1mm thick. ya I know paint wont hide the lines, mostly im just hoping to disguise them until later when i can properly finish the piece. i think ill just see how far i get with them.

TurboCharizard oohhhh... i did not know that... ok ill adjust
 
S225 infill was 20%, walls 1mm thick. ya I know paint wont hide the lines, mostly im just hoping to disguise them until later when i can properly finish the piece. i think ill just see how far i get with them.

TurboCharizard oohhhh... i did not know that... ok ill adjust

Depending on what your settings look like you might try setting each line width to .5mm if you haven't already. Two walls get you the 1mm thickness instead of three thinner walls. Saves on time and there's been no issue with my .4mm nozzle doing this.
 
Do you have a palm sander? They're a bit of an investment but boy will they save you a LOT of time and effort!
 
I also printed mine at about 16 hours. Did 2.8 later height, 12% infil with the gyroid, and 2 walls. Layers are not that visible but I'll be using filler primer anyways.
 
The forearms are done ! Well mostly. I need to add some padding to keep them in place but that’s pretty minor.

1DEAAFC8-269B-46C1-A790-E80661E9B5F0.jpegD53CC4A9-DC63-4926-8CA6-ECC2C2206563.jpeg9CA0643B-39C6-424E-B94A-F08DC02B27D1.jpeg

3d printed from thingiverse. I couldn’t tell any differences from the right and left so I just printed the right one twice. It looked like a better file than the ones in the armory. I added a couple details with 2mm Eva foam.
i used an ender 3 pro, 0.22mm layer hight. 12% infill and 1mm walls. I believe they took roughly 30 hrs each to print In total.

I used my sla printer resin to smooth them out. Worked like a dream. I sanded the pla print a bit before painting them in resin than cured them with uv light. Sanded again and primed them. The resin is really easy to sand. Not sure how well it’d work with normal uv resin (I think it’s a bit thicker in consistency than printer resin) but I highly recommend getting a bottle of sla resin to anyone else with a fdm printer and is printing a whole suit.
basically I followed Uncle Jesse’s video


it doesn’t look like I’ll be wearing it for the con this weekend. I haven’t finished the strapping or the helmet yet. I was getting way too stressed
 
Last edited:
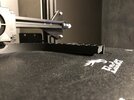
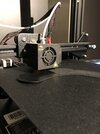
Hello 3d printing people, ive run into an issue printing.
Ive using esun pla+ recomended 220-260 nozzle temp
Im printing at nozzle 220 in the pics, bed is set at 70
Im not sure if this is a bed adhesion problem or a temp problem. Anyone know what is causing the edges to bow and lift like this? Ive just changed spools and this one is really frustrating

911EEAC3-40A2-431E-BC74-66123142CFDB.jpegEA090FE7-E719-459F-AAD4-CB35114B43B5.jpeg

The first bunch of layers always look fine so i dont think its the bed level. The edges start peeling after about 45 mins or printing and it gets worse and worse as it goes. I never had this problem with the other filament. (Which was pla+ Temp 205-225)
 
Hello 3d printing people, ive run into an issue printing.
Ive using esun pla+ recomended 220-260 nozzle temp
Im printing at nozzle 220 in the pics, bed is set at 70
Im not sure if this is a bed adhesion problem or a temp problem. Anyone know what is causing the edges to bow and lift like this? Ive just changed spools and this one is really frustrating

View attachment 310947View attachment 310948

The first bunch of layers always look fine so i dont think its the bed level. The edges start peeling after about 45 mins or printing and it gets worse and worse as it goes. I never had this problem with the other filament. (Which was pla+ Temp 205-225)
I would recommend doing a brim or a raft. This helps keep the print from warping. And for that type of Temps needed I would recommend building an enclosure to help maintain temp.
 
I would recommend doing a brim or a raft. This helps keep the print from warping. And for that type of Temps needed I would recommend building an enclosure to help maintain temp.
Ya, I tried the raft in the second pic it mostly worked to print it but when I started on the actual part the filament didn’t stick to the raft.. I tried the brim yesterday and got spaghetti. I’ll give it another go though. What is considered a good enclosure? I could probably find a box to put over it all.
 
A brim is helpful, and a raft can be used as a last resort if the lifting (called "warping") doesn't cease. Make sure there are no breezes or cold sources near the printer that would affect temperature, as usually an uneven cooling of parts is what causes this. You can use hairspray, glue sticks or masking tape on the bed to help with adhesion. It may help to print the first few layers with a slightly higher nozzle temp too. And because it always does help... double check your bed's level, and not only that, make sure the nozzle is close enough to the bed.
 
I've had that happen with big prints, usually a raft does solve it. It's just another of the absolute smorgasbord of issues that Enders have to offer. As Demon said, an enclosure would probably work but I've never bothered to try putting one together. Anything would help, I have seen people use cardboard boxes without issue. Probably a good idea to let it warm up inside before trying to print.

Or you could try boosting the bed temperature, that sometimes does the trick for me. My printer is basically on constant life support, every time I change a roll of filament the balance is disrupted and I have to dial it all back in. I am starting to see why people spend $200 more on the fancy prebuilts.
 
Ya, I tried the raft in the second pic it mostly worked to print it but when I started on the actual part the filament didn’t stick to the raft.. I tried the brim yesterday and got spaghetti. I’ll give it another go though. What is considered a good enclosure? I could probably find a box to put over it all.
Hmm. What I do is I turn the fan off for the first few layers and then turn it to 80% for the rest of the print, only because the filament may be cooling off too quickly, as Planet mentioned. And for enclosures there are multiple option, such as those that Argent said, when I was planning to build mine I got three Ikea lack tables as the main body. Cheap and sturdy, but I never put the top on because it was not needed. And to go along with the glue stick method, the brand I use is Elmer's purple stick. Cleans off easily, but I only use it for one print. What methods are you doing to clean the build plate and leveling?
 
Hmm. What I do is I turn the fan off for the first few layers and then turn it to 80% for the rest of the print, only because the filament may be cooling off too quickly, as Planet mentioned. And for enclosures there are multiple option, such as those that Argent said, when I was planning to build mine I got three Ikea lack tables as the main body. Cheap and sturdy, but I never put the top on because it was not needed. And to go along with the glue stick method, the brand I use is Elmer's purple stick. Cleans off easily, but I only use it for one print. What methods are you doing to clean the build plate and leveling?
I cleaned the plate with soap and then again with alcohol. I use the paper leveling method. I check twice to make sure it’s good. The printer is in my windowless basement so no drafts or anything should be affecting it, it’s around 25’C.

I’ve just restarted it at 225 nozzle and 80 bed with a brim. Fingers crossed. If this doesn’t work I might go get some of the other lower temp pla. I can’t believe how finicky this stuff is.
 
Status
Not open for further replies.
Back
Top